If you're searching for the best psilocybe cubensis grow bag, here's the short answer: an all-in-one grow bag that includes pre-sterilized grain spawn, bulk substrate, a self-healing injection port, and a microporous filter patch is the most reliable starting point for most home growers today. But not all bags are built the same, and the difference between a clean colonization and a contaminated bag often comes down to a few specific quality markers you can check before you buy. This guide walks you through exactly what to look for, how the main bag types compare, and what to do from day one to give your grow the best shot at success.
Best Psilocybe Cubensis Grow Bag: Reviews and Selection Guide
Marcus Holloway
24 Mar 2026
What a psilocybe cubensis grow bag actually includes
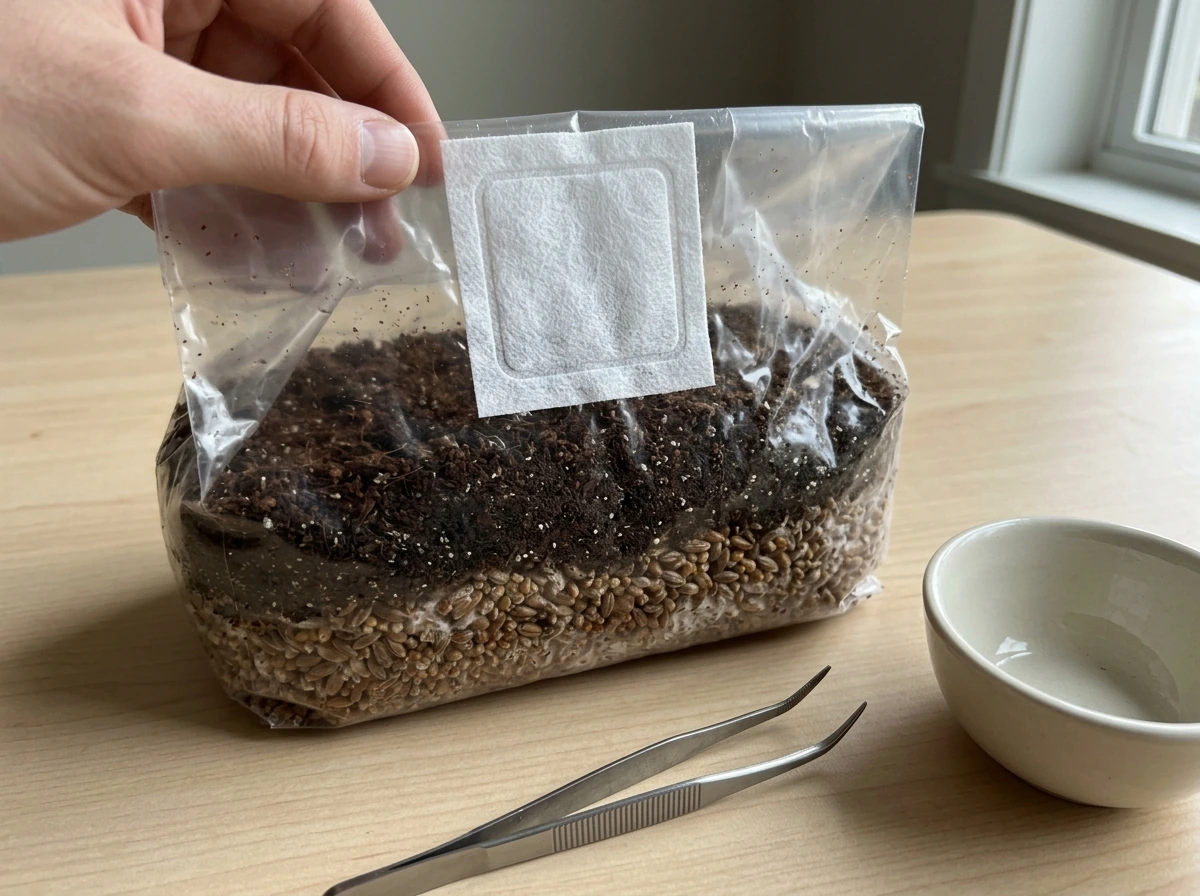
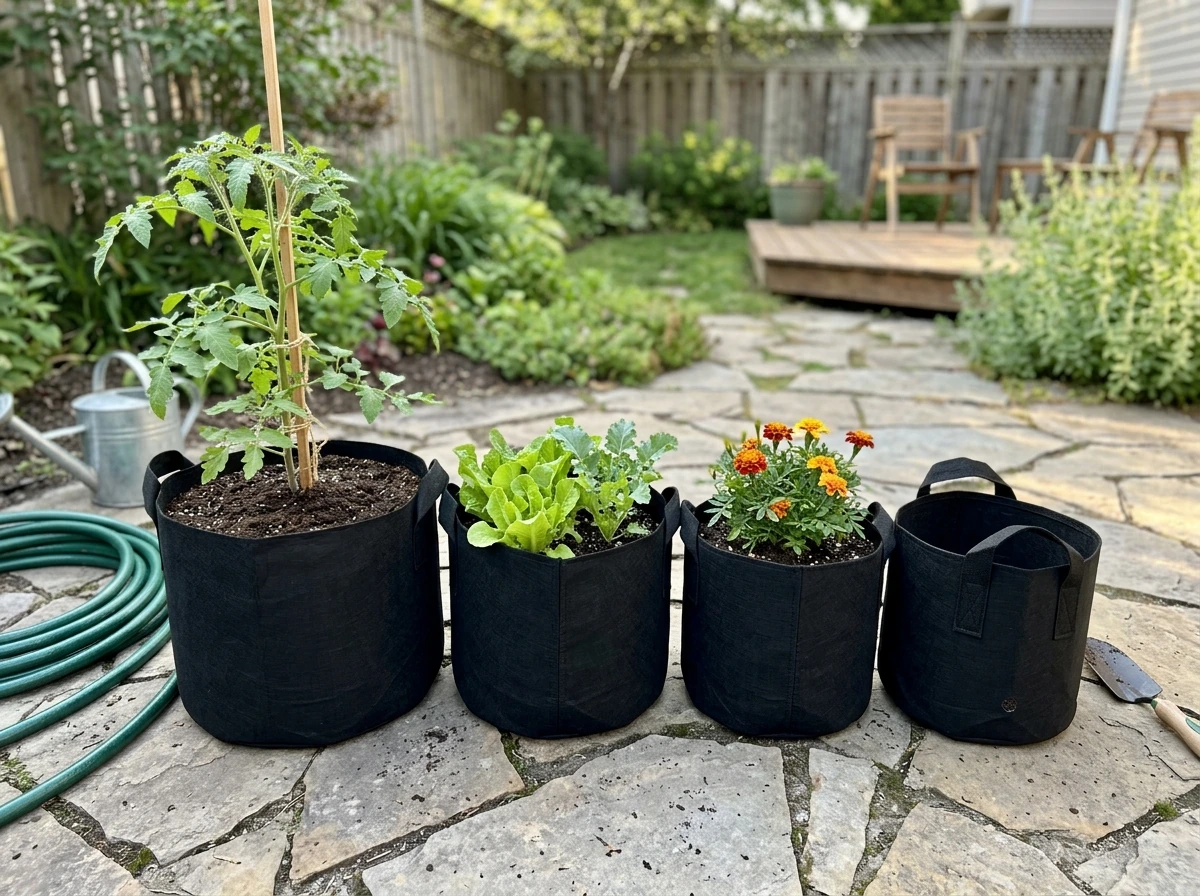
The term "grow bag" gets used loosely, so it helps to know what you're actually buying. In the psilocybe cubensis context, a grow bag is a self-contained plastic bag (not a fabric grow bag like you'd use for tomatoes) designed to house and colonize mushroom substrate in a sterile environment. The bag itself is typically made from thick, food-grade polyethylene plastic, around 3.2 mil thick, with a microporous filter patch built into the side or top. That filter patch, rated at 0.2 microns, allows carbon dioxide to escape and fresh air to enter while physically blocking bacteria, mold spores, and other contaminants.
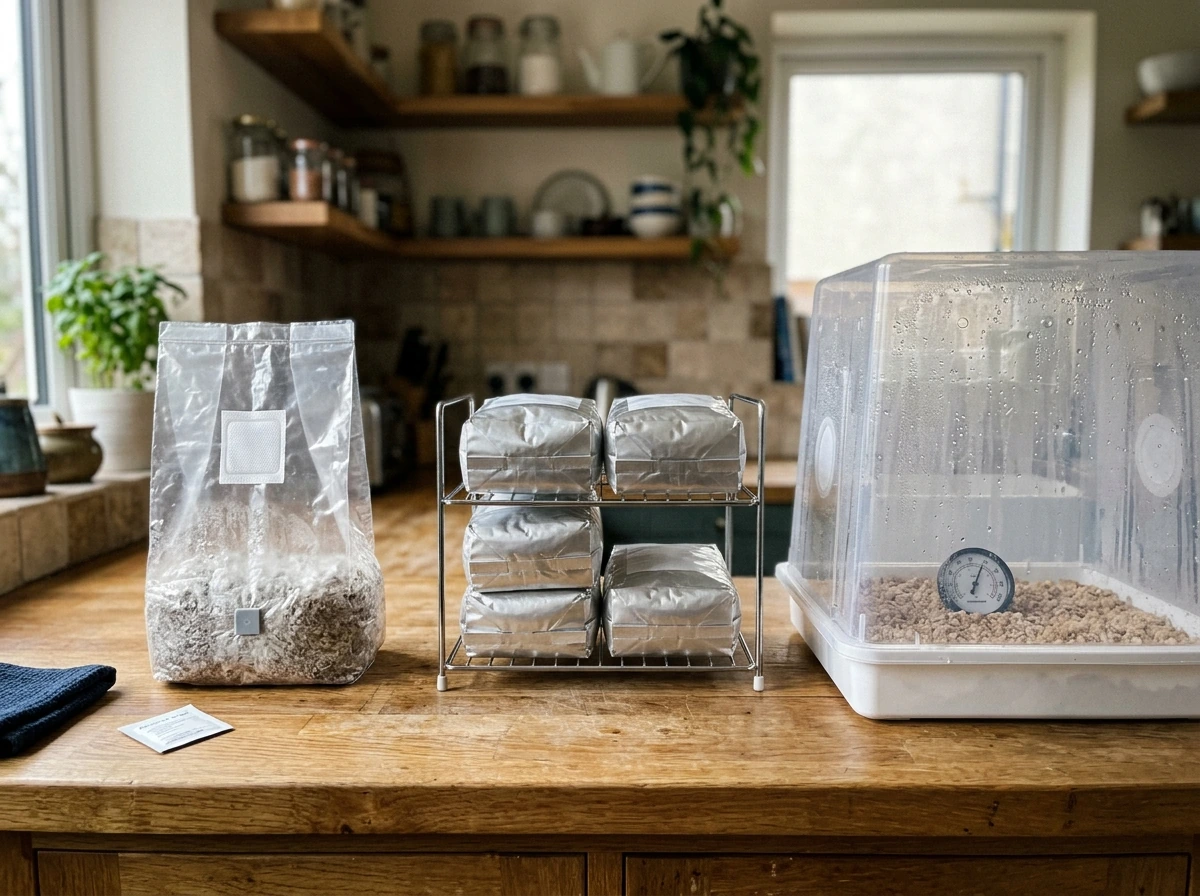
An all-in-one bag takes this further by pre-loading everything inside: sterilized grain spawn (usually rye, wheat berries, or oats) plus a bulk substrate layer (typically a mix of coco coir, vermiculite, and sometimes gypsum). The bag also includes a self-healing injection port, which is a small silicone or foam disc sealed into the plastic that you can push a needle through repeatedly without it tearing or letting in contaminants. A typical all-in-one bag weighs around 4 pounds and is sized roughly 5 x 5 x 20 inches, holding about 4 quarts of material. That's enough substrate to produce a meaningful flush without needing extra equipment. The bag also includes a self-healing injection port, which is a small silicone or foam disc sealed into the plastic that you can push a needle through repeatedly without it tearing or letting in contaminants. A typical all-in-one bag weighs around 4 pounds and is sized roughly 5 x 5 x 20 inches, holding about 4 quarts of material. That's enough substrate to produce a meaningful flush without needing extra equipment.
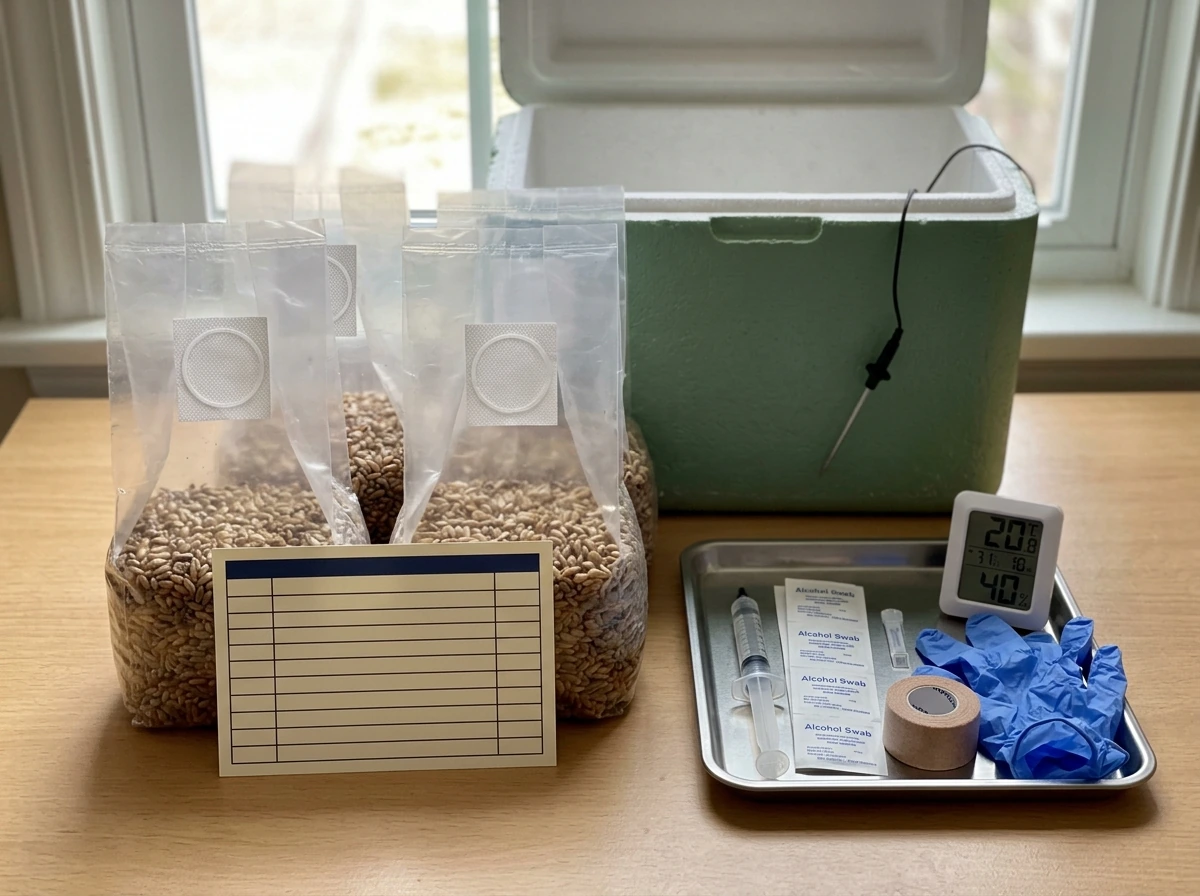
Some kits ship additional accessories in the box alongside the bag: alcohol wipes, a spore syringe, gloves, and printed instructions. Others ship just the bag itself and expect you to source your spore syringe separately. Knowing which type you're ordering matters, because a bag without spores isn't ready to inoculate on arrival.
How to choose the best grow bag: quality, freshness, and contamination resistance
Freshness is the single most important factor people overlook. Pre-sterilized grain spawn has a limited shelf life once it leaves the lab. Bags and jars should be used within 4 to 6 weeks of arrival, and if you need to hold them longer, the fridge (not the freezer) at 55 to 68°F is the right storage spot. A bag that sat in a warehouse or on a shipping truck for weeks before it reaches you may already be past its reliable window. Always check the vendor's shipping and freshness policy before ordering.
Filter patch quality is the second thing to evaluate. A 0.2 micron filter is the current standard for keeping contaminants out while still allowing gas exchange. Some cheaper bags use lower-grade filter patches or use polyfill stuffed into a hole, which is significantly less reliable. The filter patch should be clearly visible, securely bonded to the bag, and kept away from contact during all handling steps. One of the most common beginner mistakes is touching or folding the filter patch area, which can compromise the sterile barrier.
Plastic thickness matters too. Bags rated at 3.2 mil are thick enough to resist punctures during handling while still being flexible enough to work with. Thinner bags tear more easily and are harder to reseal reliably after inoculation. If a vendor doesn't list the mil thickness of their bags, that's worth noting.
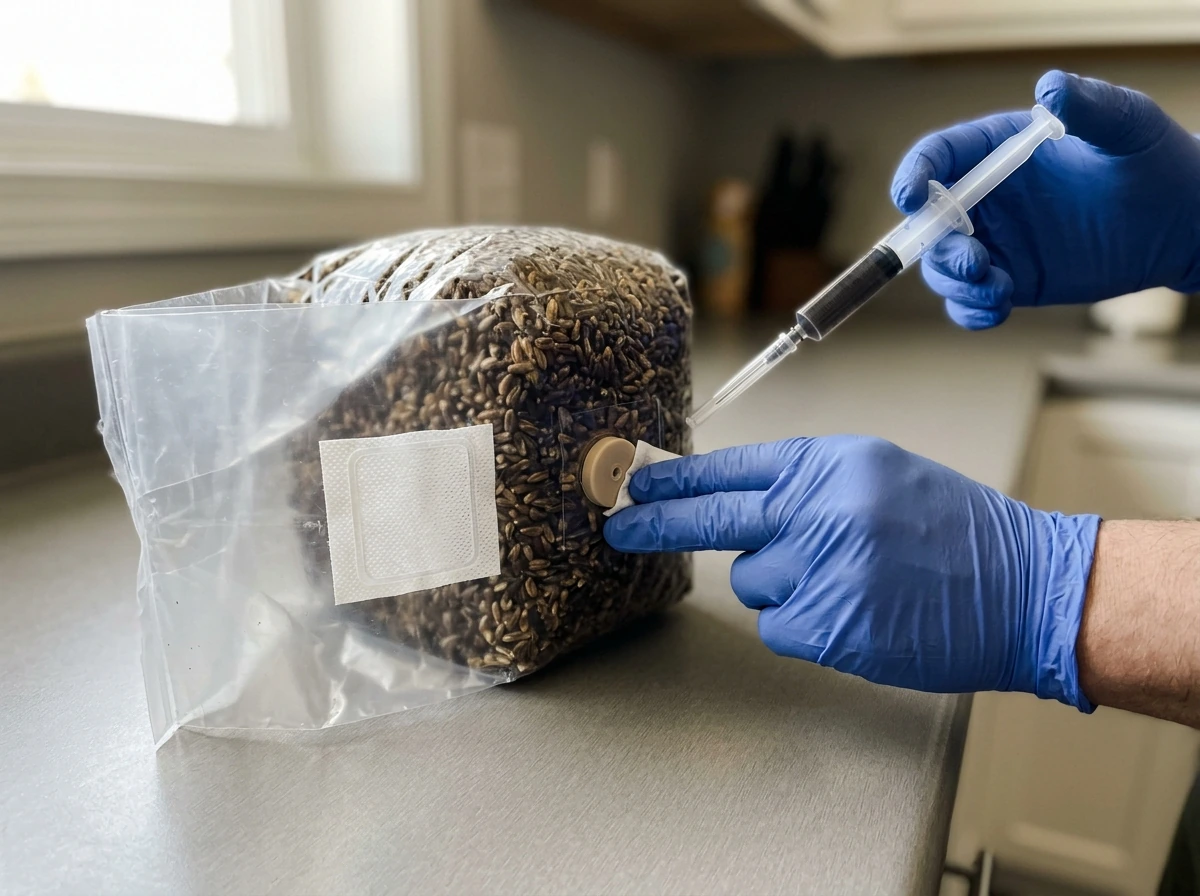
Finally, look at the injection port design. A self-healing foam or silicone port lets you inoculate cleanly without opening the bag. If a bag requires you to open it to inoculate, you're introducing contamination risk the moment you do. More on this in the troubleshooting section, but injecting through the filter patch by accident (instead of through the port) is a real and common failure mode that can ruin a bag before colonization even begins.
The three main types of psilocybe cubensis grow bags compared

There are three distinct bag-style grow systems people commonly buy, and they serve different skill levels and goals. Here's how they actually compare.
| Type | What's Included | Skill Level | Contamination Risk | Flexibility | Best For |
|---|---|---|---|---|---|
| All-in-One Grow Bag | Pre-sterilized grain + bulk substrate, injection port, filter patch (sometimes spores) | Beginner | Low (closed system) | Low (fixed substrate ratio) | First grows, minimal equipment |
| Supply-Pack Grow Bag (empty) | Sterile bag with filter patch and injection port, no substrate | Intermediate | Medium (you fill and seal) | High (choose your own substrate) | Growers who want custom substrate blends |
| Kit-in-a-Bag (full kit) | All-in-one bag + spores, gloves, wipes, instructions in a box | Beginner | Low (most variables handled) | Low (vendor-controlled) | Complete beginners wanting one purchase |
The all-in-one grow bag is the right choice for most people reading this. The substrate is already sterilized and portioned, the grain-to-bulk ratio is dialed in, and the closed system means you're not opening anything and exposing contents to the air until you absolutely need to. The kit-in-a-bag version is essentially the same thing with accessories included, which is worth the small price premium if you don't already have spore syringes and basic supplies. Supply-pack bags (sold empty or with just substrate, no spawn) are better suited to growers who already have a sterilization setup and want to run their own grain-to-substrate ratios. The kit-in-a-bag version is essentially the same thing with accessories included, which is worth the small price premium if you don't already have spore syringes and basic supplies. Supply-pack bags (sold empty or with just substrate, no spawn) are better suited to growers who already have a sterilization setup and want to run their own grain-to-substrate ratios. If you're comparing grow bags to jars, those are worth exploring as separate decisions once you have a successful colonization under your belt.
What to check before you buy
Run through this checklist before you finalize a purchase. It covers the details that separate a reliable grow bag from a frustrating one.
- Filter patch rating: look for 0.2 micron specifically, not polyfill or unrated material
- Bag thickness: 3.2 mil or thicker for durability and reliable resealing
- Self-healing injection port: foam or silicone, pre-installed and sealed into the bag (not a separate piece you attach)
- Freshness window: vendor should state bags are shipped fresh and should be used within 4 to 6 weeks of arrival
- Substrate composition: grain spawn plus a bulk substrate blend listed separately, not just grain alone
- Bag weight and volume: around 4 lbs / 4 quarts is the standard baseline for a single bag grow
- Spores included or separate: confirm whether a spore syringe is included or sold separately
- Instructions quality: step-by-step inoculation, break-and-shake timing, and contamination guidance should all be included
- Storage and shipping info: vendor should provide temperature guidelines (55 to 68°F storage) and handling notes
A vendor that lists all of these details clearly is almost always more trustworthy than one that doesn't. Gaps in product information tend to reflect gaps in quality control.
Setup, handling, and what to expect week by week
Once your bag arrives, give it a visual inspection before you do anything. Check the filter patch orientation (it should be upright and unobstructed), look for any discoloration or unusual smells inside the bag, and confirm the injection port is intact. If anything looks off, contact the vendor immediately. Don't inoculate a bag that shows signs of pre-existing contamination.
Inoculation
Wipe the injection port with an alcohol swab and let it dry for 30 seconds. Draw your spore syringe (typically 1 to 3 cc per bag), flame-sterilize the needle, let it cool, then push it through the injection port at a slight angle and inject slowly. Do not inject through the filter patch. This sounds obvious but it happens, and it almost always ruins the bag. After injecting, wipe the port again and leave the bag undisturbed.
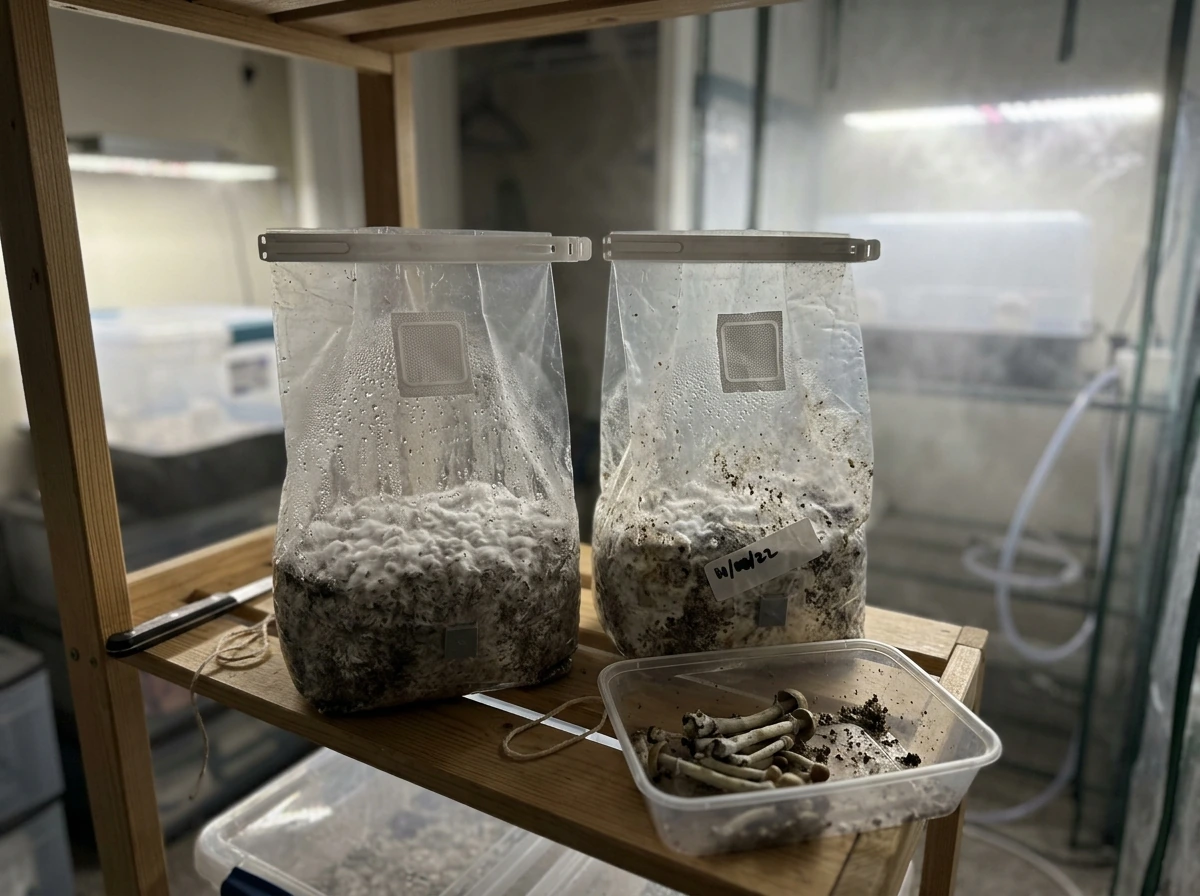
Incubation
Place the bag in a warm, dark location at 75 to 80°F. Keep the filter patch upright and unfolded so gas exchange can happen. You want minimal fresh air exchange at this stage, just what the filter patch allows passively. Within 1 to 2 weeks you should start seeing white, fluffy mycelium growth radiating from your injection points. This is normal and healthy. Green, black, pink, or yellow colors are not normal and mean contamination.
Break and shake
Once the bag is roughly half-covered in white mycelium, it's time to break and shake. Knead and mix the contents through the outside of the bag to distribute colonized grain throughout the substrate. Be careful not to touch, squeeze, or tear the filter patch area during this step. After mixing, pack the contents back to the bottom of the bag and return it to the incubation spot. Full colonization typically completes within 2 to 4 weeks total from inoculation.
Fruiting
Once the bag is fully colonized (solid white throughout with no soft spots or off-colors), it's ready to fruit. Move it to a slightly cooler location at 71 to 75°F. Fruiting requires more fresh air exchange than incubation. Fold or cut a corner of the bag open (a small opening, about 1 cm, just above the substrate level works well) or rely on a cut in the bag side to allow fresh air in and CO2 out. Some growers cut the bag down to just above the substrate surface and add a thin casing layer of pasteurized coir or peat and vermiculite mix to improve pinning consistency. Target relative humidity around 90% and avoid spraying water directly onto the developing pins or the cake surface. Mist the sides of whatever container or tent you're fruiting in, not the mushrooms themselves. Fresh air exchange at least 3 times per day during fruiting is the community-standard minimum. If you see good condensation on the bag sides, humidity is adequate. If the sides look completely dry, it's too dry.
Timeline summary
| Stage | Timeframe | Temperature | Key Action |
|---|---|---|---|
| Inoculation | Day 0 | 75–80°F | Inject spores through port, leave undisturbed |
| Early colonization | Days 1–14 | 75–80°F | Check for white growth, minimal FAE |
| Break and shake | ~Day 10–14 (50% coverage) | 75–80°F | Mix contents, avoid filter patch |
| Full colonization | Days 14–28 | 75–80°F | Wait for solid white throughout |
| Fruiting initiation | Days 21–35+ | 71–75°F | Introduce FAE, raise humidity to ~90% |
| First pins to harvest | Days 28–42+ | 71–75°F | Harvest before veils tear fully open |
Troubleshooting common grow bag problems
Green, black, or pink patches inside the bag
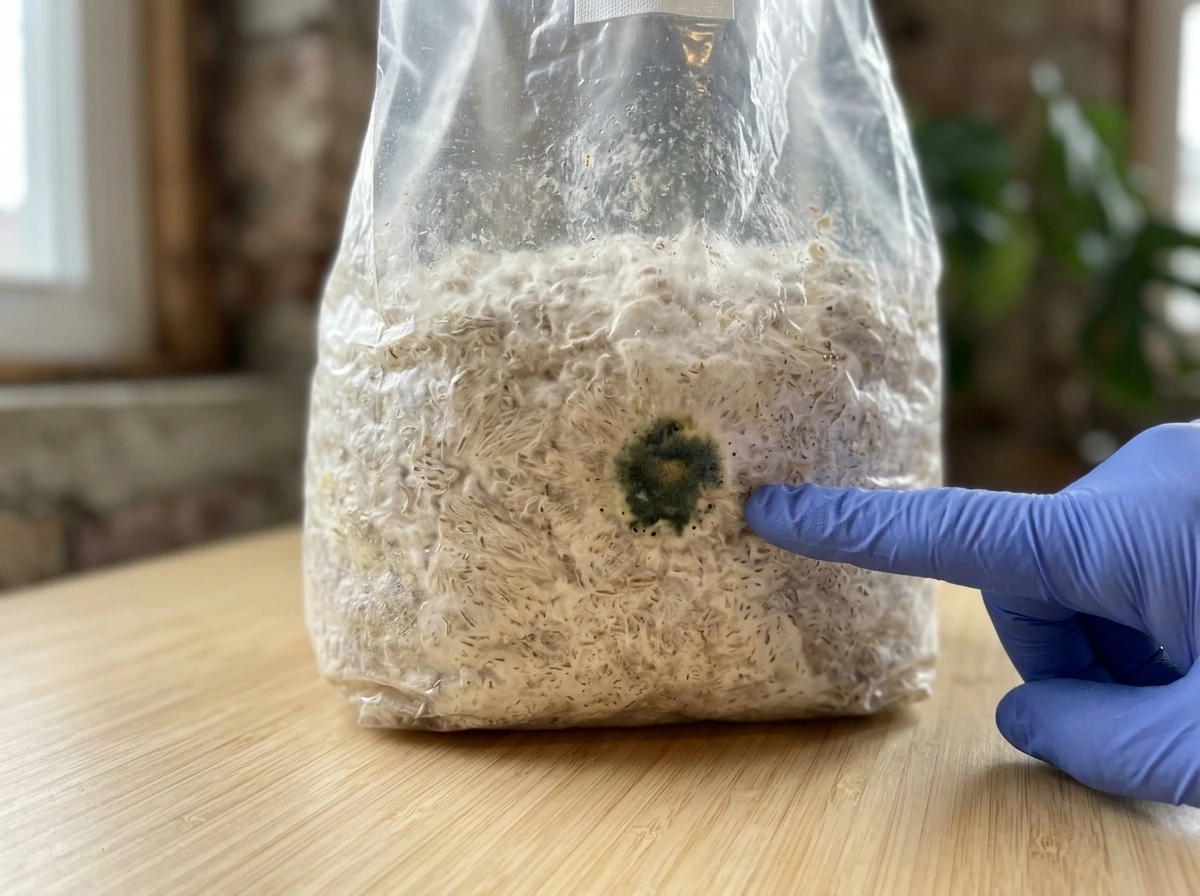
This is contamination, almost certainly Trichoderma (green), Aspergillus, or bacterial rot (pink or slimy). If you catch it early and it's a small isolated spot, some growers have had success removing the affected area with a sterile scalpel and spraying with hydrogen peroxide, then increasing ventilation. But honestly, if contamination is visible during incubation, the safest and least frustrating move is to discard the bag. Contamination spreads fast, and trying to save a bag usually just delays the inevitable and risks contaminating your grow area. Seal the bag, bag it again, and discard it away from your growing space. Then disinfect your work area thoroughly before starting the next bag.
Colonization has stalled or stopped
If growth has been present but suddenly stops spreading, temperature is usually the culprit. Check that your incubation spot is consistently hitting 75 to 80°F and isn't dropping at night. A cheap digital thermometer with a probe is worth keeping inside or near the bag. If temperature is fine, check the injection points for any contamination around them. Sometimes a stall is just a slow colonizer and will resume on its own within a few days.
No growth at all after two weeks
First check your spore syringe viability. Spore syringes stored properly in a dark, cool location can last up to 12 months, but if yours was old or stored poorly, viability may be low. If you inoculated correctly, the bag has been warm, and two weeks have passed with no visible growth, re-inoculation through the port with a fresh syringe is worth trying before discarding.
Pins are forming but drying out before maturing
This usually means your humidity is too low or your FAE is too aggressive. The community condensation test is useful here: if there's no condensation visible on the bag or container walls, it's too dry. Reduce fan time, increase misting frequency (on the walls, not the pins), and make sure you're not over-ventilating. A fruiting chamber with some ability to retain humidity works better than an open shelf.
You injected through the filter patch by mistake
This is a real failure mode. The filter patch is no longer sterile once punctured with a needle. You can try to tape over it with micropore tape and continue, but contamination risk is now significantly elevated. If you have a second bag available, it's generally worth starting fresh rather than gambling on a compromised bag.
When to restart entirely
Restart when you see: any visible contamination spreading past a small isolated spot, an unusual smell (sour, rotten, or chemical), visible wet rot, or slimy patches anywhere on the substrate. Before your next inoculation, disinfect everything that touched the contaminated bag and review your sterile technique. Most grow bag failures trace back to either a compromised filter patch, improper inoculation technique, or a bag that arrived past its freshness window.
Your buying checklist and next steps
Here's everything condensed into a practical checklist you can run through right now before purchasing and again on arrival.
Before you buy
- Confirm the bag is an all-in-one with grain spawn plus bulk substrate already inside (not just grain)
- Verify a 0.2 micron filter patch is included and described as microporous (not polyfill)
- Check that a self-healing injection port is built into the bag
- Confirm bag plastic is 3.2 mil or thicker
- Check whether a spore syringe is included or if you need to source one separately
- Look for a stated freshness window (4 to 6 weeks from arrival) and proper storage guidance
- Choose a vendor that provides clear, step-by-step instructions including contamination guidance
When your bag arrives
- Inspect the bag immediately for discoloration, unusual smells, or a damaged filter patch
- Store in the fridge at 55 to 68°F if you're not inoculating within a day or two
- Inoculate within 4 to 6 weeks of arrival for best reliability
- Keep the filter patch upright and unobstructed at all times
- Use alcohol wipes and a flame-sterilized needle before injecting through the port only
During your grow
- Maintain 75 to 80°F during incubation, drop to 71 to 75°F for fruiting
- Break and shake at roughly 50% colonization coverage
- Increase fresh air exchange to at least 3 times daily once you initiate fruiting
- Target 90% relative humidity during fruiting; use the condensation-on-walls test as your guide
- Discard immediately at any sign of contamination spreading; disinfect your area before the next attempt
if you find yourself wanting more control over substrate ratios, larger yields, or multiple flushes, if you find yourself wanting more control over substrate ratios, larger yields, or multiple flushes, comparing [monotub vs grow bag](/mushroom-grow-bags/mushroom-grow-bag-vs-monotub) setups and adjusting your next move accordingly is a popular next step that many growers take after their first successful bag grow. monotub vs grow bag. best all in one mushroom grow bag reddit. where to buy mushroom grow bags. can you reuse mushroom grow bags
FAQ
Can I reuse a best psilocybe cubensis grow bag after a failed or finished grow?
In most cases, no. Even if the bag looks clean, once the filter area or injection port is punctured, sterility is compromised. For a finished bag, residue plus moisture films can encourage fast contamination in any later use. If you must experiment, treat re-use as a high-risk science project, and keep the bag sealed and well away from fresh, planned grows.
How do I tell whether the injection port or filter patch has been damaged during shipping?
Look for loose or peeling edges where the patch bonds to the plastic, wrinkling that folds over the patch surface, and any pinholes or tears near the port. If the injection port appears cracked or the foam or silicone disc looks separated from the bag wall, avoid inoculating it. A damaged barrier can cause contamination even if incubation temperature is perfect.
What size and volume bag should I choose if I want a bigger yield?
Choose based on the amount of ready-to-use material, not the bag dimensions alone. Larger bags usually hold more than one typical inoculation “dose,” so follow the vendor’s stated syringe volume and grain-to-bulk target. If your goal is multiple flushes, ensure the bag includes enough substrate depth for water retention, and expect yield to still vary by genetics and fruiting conditions.
If my bag arrives late and feels “cold,” should I wait before inoculating?
Yes. Let the bag reach room temperature in a clean area before you inject so condensation is less likely to form inside the bag. Injecting when the bag is cold can create moisture at the port area, which increases the chance that early bacteria take hold. Once it warms up, keep handling minimal and sterile.
How much spore syringe volume should I use in a grow bag?
Use the vendor’s guidance for that specific bag size. Many bags are around a few quarts of material, which typically aligns with a small syringe volume per bag, but over-inoculation can dump extra spores and bacteria into the substrate. If your supplier does not specify volume, match the volume range they recommend for similar bag weights, then keep your technique consistent.
Is it ever better to use a liquid culture instead of a spore syringe in these bags?
It can be, but it depends on how the bag is designed and how you plan to handle genetics. Liquid cultures can colonize faster and be more predictable, but they also spread issues quickly if your culture is contaminated. If the bag kit only mentions spore syringes, confirm that injection through the port is intended for that product and that your workflow matches the same sterile handling steps.
What should I do if I accidentally inject through the filter patch instead of the injection port?
Stop and reassess immediately. Once you puncture the filter area, you increase contamination risk because the barrier is no longer sterile. You may tape over the area with micropore tape, but you should treat it as compromised and plan to monitor closely. If you have another clean bag, it is often smarter to start fresh rather than gamble.
Do I need to open the bag at any point during incubation or fruiting?
During incubation, opening is generally avoided when the bag is designed as a closed system with a port and filter patch. During fruiting, some growers create a small opening or cut a corner, but the goal is controlled fresh air exchange without fully exposing the substrate to the room. If you are seeing inconsistent results, keep openings minimal and sealed except where the bag is designed to exchange gas.
Why is my bag not colonizing after 2 weeks, but it also doesn’t show obvious contamination?
Stall without contamination commonly points to temperature instability or low metabolic activity from low-viability spores. Confirm the incubation spot stays in the target range consistently, not just at setup. If temperature is stable and there is no discoloration or off odors, try a re-inoculation through the port using a fresh syringe, but only after you verify your syringe storage conditions and your sterile technique.
What relative humidity and fresh air exchange balance should I aim for during fruiting?
Aim for humidity high enough to create steady condensation on the fruiting chamber walls or bag sides, and fresh air exchange enough to prevent CO2 buildup. If the chamber walls stay dry, raise humidity by adjusting the environment and misting the chamber surfaces, not directly the pins. If you see heavy drying or fuzzy stress, reduce air blast intensity and slow down fan time.
Is hydrogen peroxide safe to use during early contamination removal in a grow bag?
It can be used by some growers as a localized treatment, but only for very small, isolated early spots and with careful sanitation afterward. Overusing it can damage healthy tissue and can also create wet conditions that invite other problems. If contamination is spreading beyond a small patch, the more reliable option is to discard to prevent contamination across your grow area.
How can I reduce contamination risk even when the grow bag is high quality?
Treat the workflow as part of the system: work in a clean area, minimize time the port is exposed, avoid touching the filter patch region, and change or re-sanitize tools between bags. Also, don’t reuse contaminated gloves or wipe surfaces repeatedly without disinfecting the work area. The bag’s filter and port help, but most failures still come from handling mistakes or freshness issues.
How long can I store pre-sterilized spawn or all-in-one bags before inoculating?
Follow the vendor’s stated freshness window, but a common rule is using within about a month to maximize reliability. If storage is needed, keep it in the recommended temperature range (typically refrigeration, not freezing), and avoid repeated temperature swings. If it arrived near the end of its shelf-life or sat warm during shipping, assume viability may be lower and plan to monitor earlier than usual.
Next Articles
Can You Reuse Mushroom Grow Bags Safely After Harvest?
Learn if you can reuse mushroom grow bags safely, how to assess contamination, and the steps to clean, dry, and rerun bl
Best Grow Bags: How to Choose, Sizes, and Top Picks
Buyer guide to the best grow bags: choose sizes and materials for vegetables, flowers, trees, and mushrooms with value t
Where to Buy Mushroom Grow Bags and How to Store Them
Find reliable places to buy mushroom grow bags plus exact storage steps to prevent drying, mold, and contamination.