If you're trying to decide between mushroom grow bags and mason jars, here's the short answer: jars are better for making and incubating grain spawn, and grow bags are better for bulk substrate colonization and fruiting. If you’re wondering can you reuse mushroom grow bags, read on for the workflow differences that affect your options. Most experienced home growers use both together rather than treating them as competitors. But if you're just starting out and want to keep things simple, an all-in-one grow bag handles the whole process in a single container and is genuinely the easier starting point. The sections below break down exactly when each method wins, what the workflows look like, and how to avoid the most common mistakes with both.
Mushroom Grow Bags vs Jars: Which Works Best for You?
What grow bags and jars actually are (and where each fits)
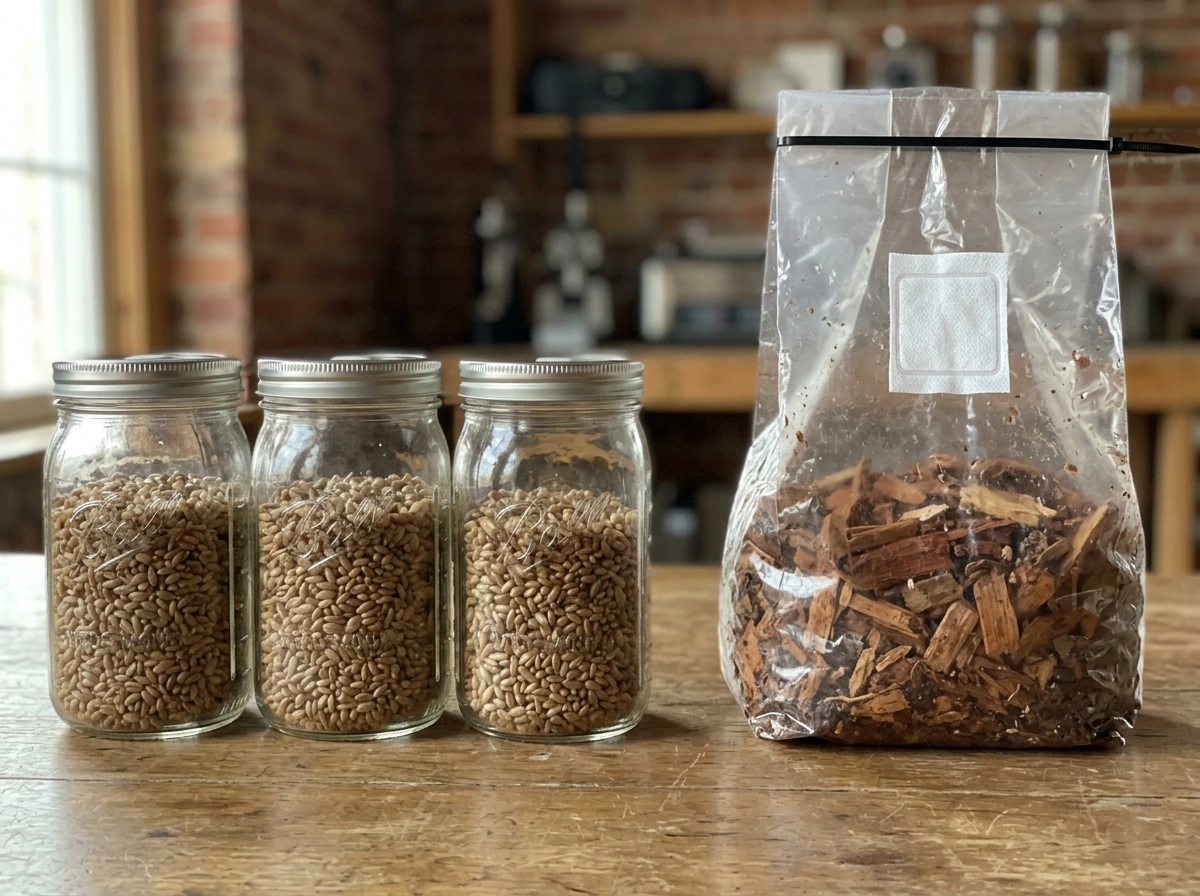
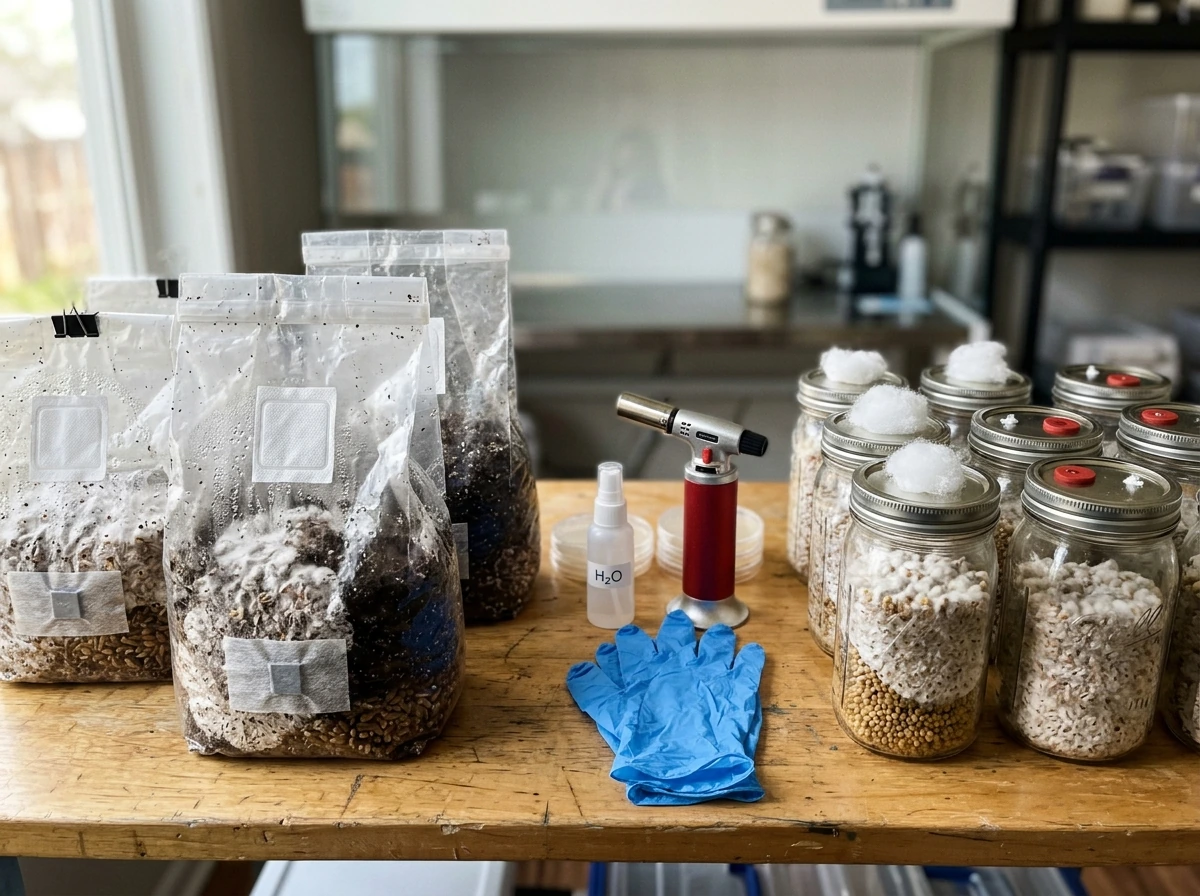
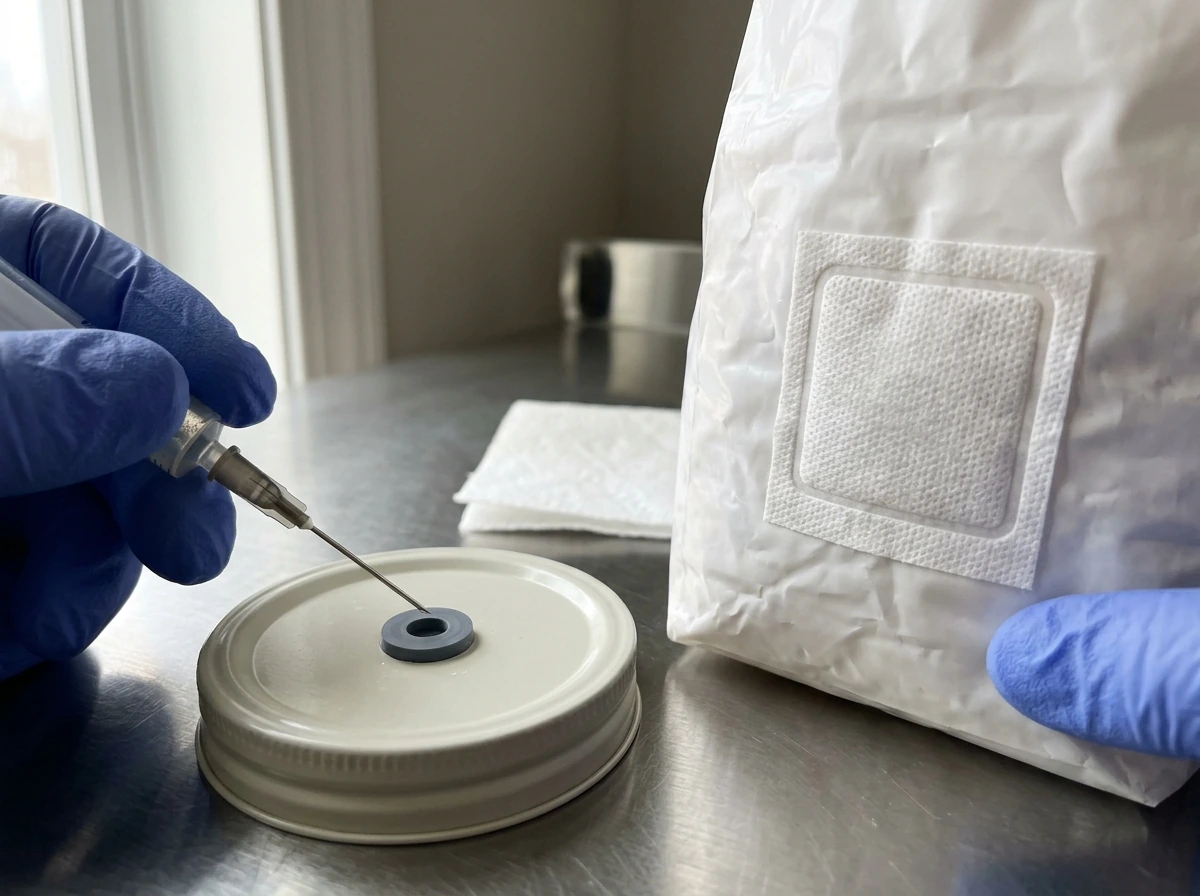
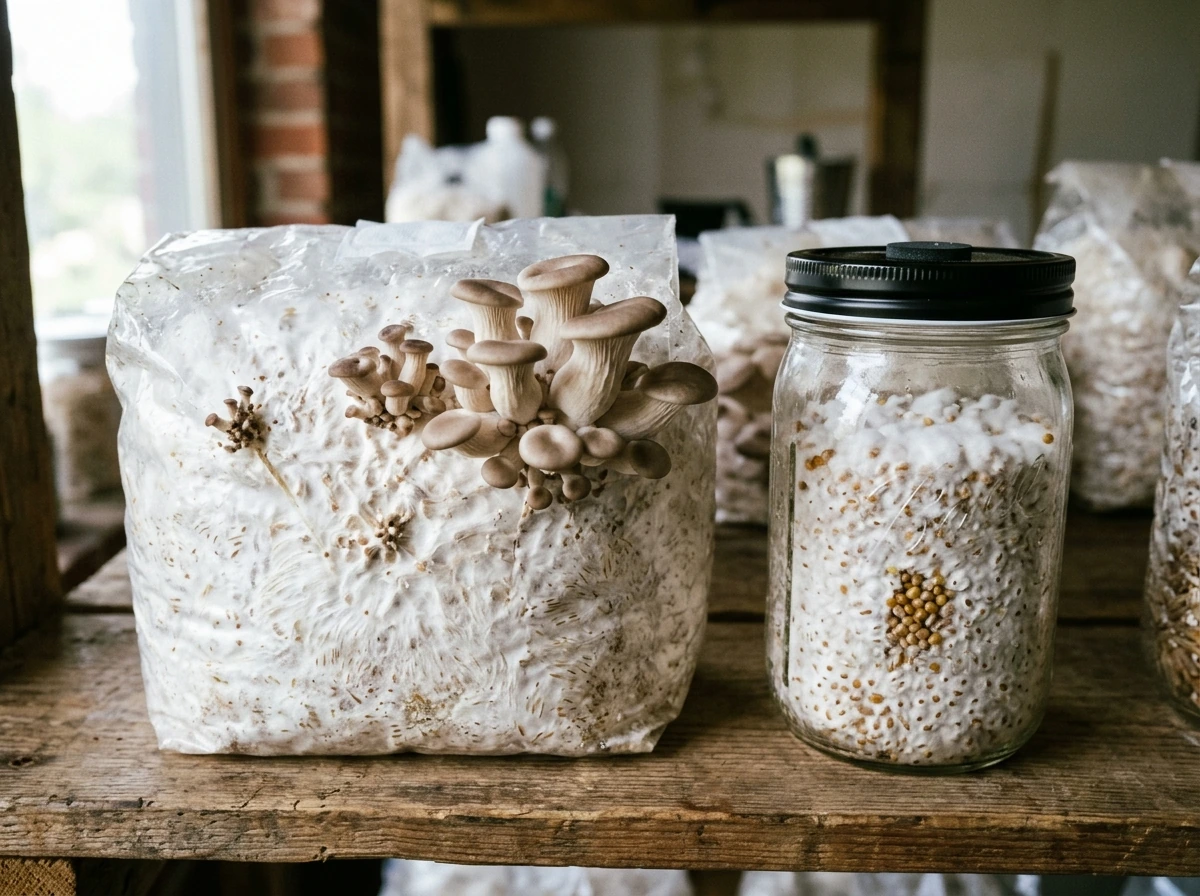
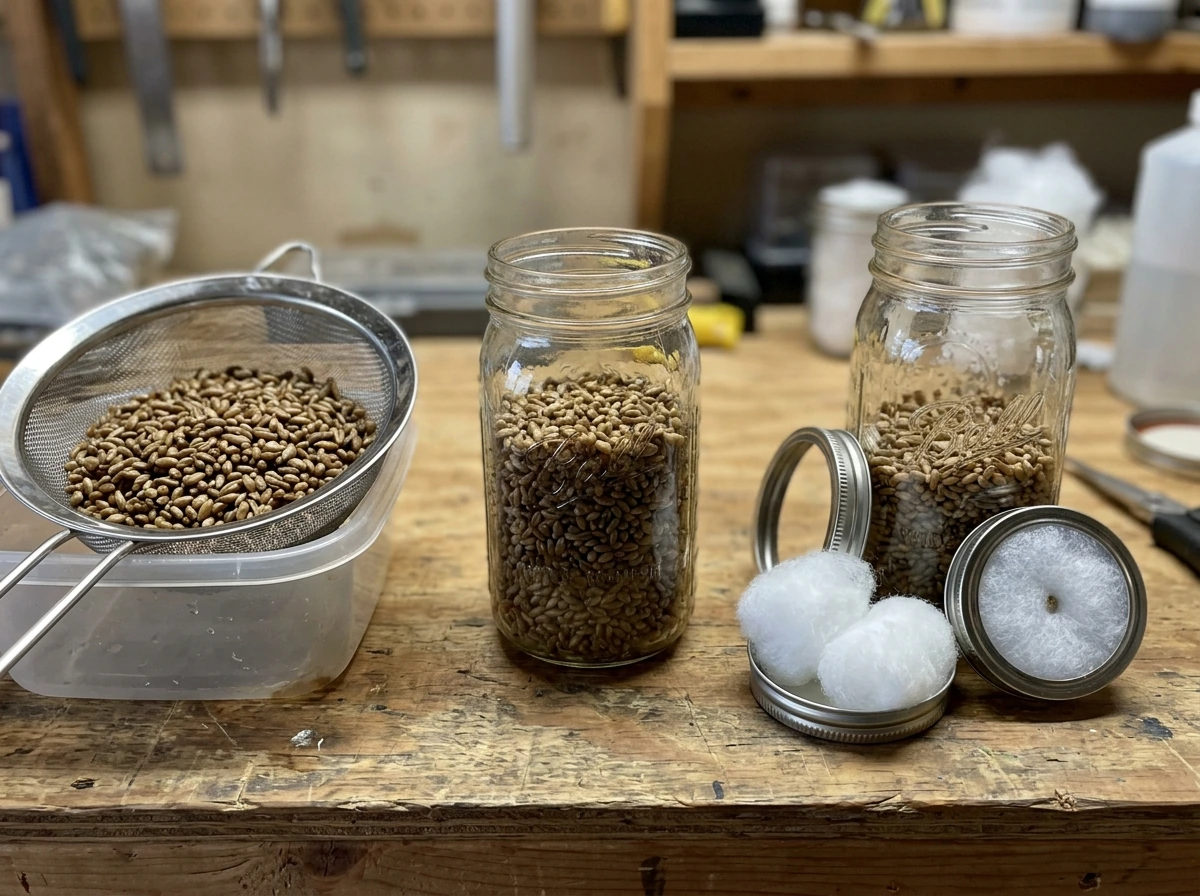
Mason jars (typically half-pint or quart sized, wide-mouth) are the classic tool for making grain spawn. You fill them with sterilized grain (rye, oats, wheat berries, or popcorn corn are all popular), inoculate with a spore syringe or liquid culture through a self-healing injection port in the lid, and let mycelium colonize the grain during incubation. That colonized grain becomes your spawn, which you then use to inoculate a larger bulk substrate. Jars are essentially the nursery stage.
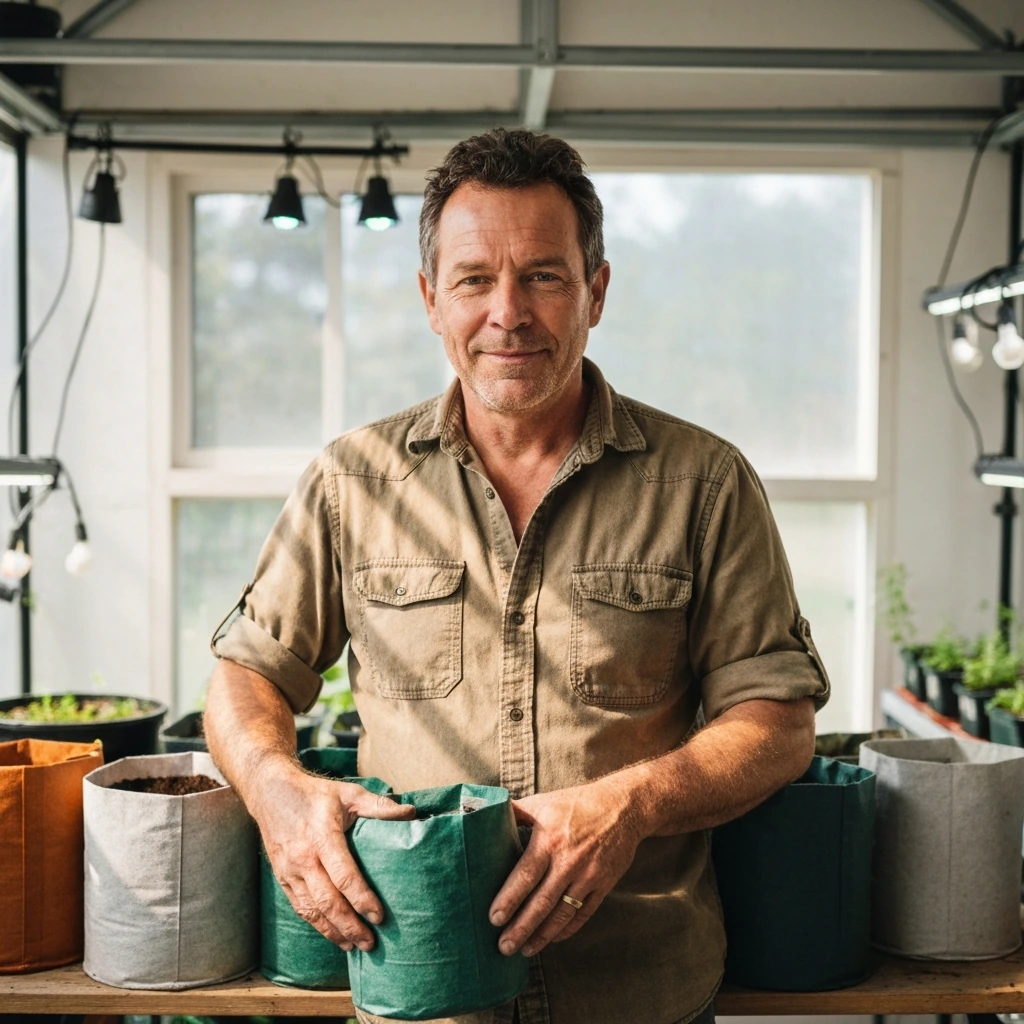
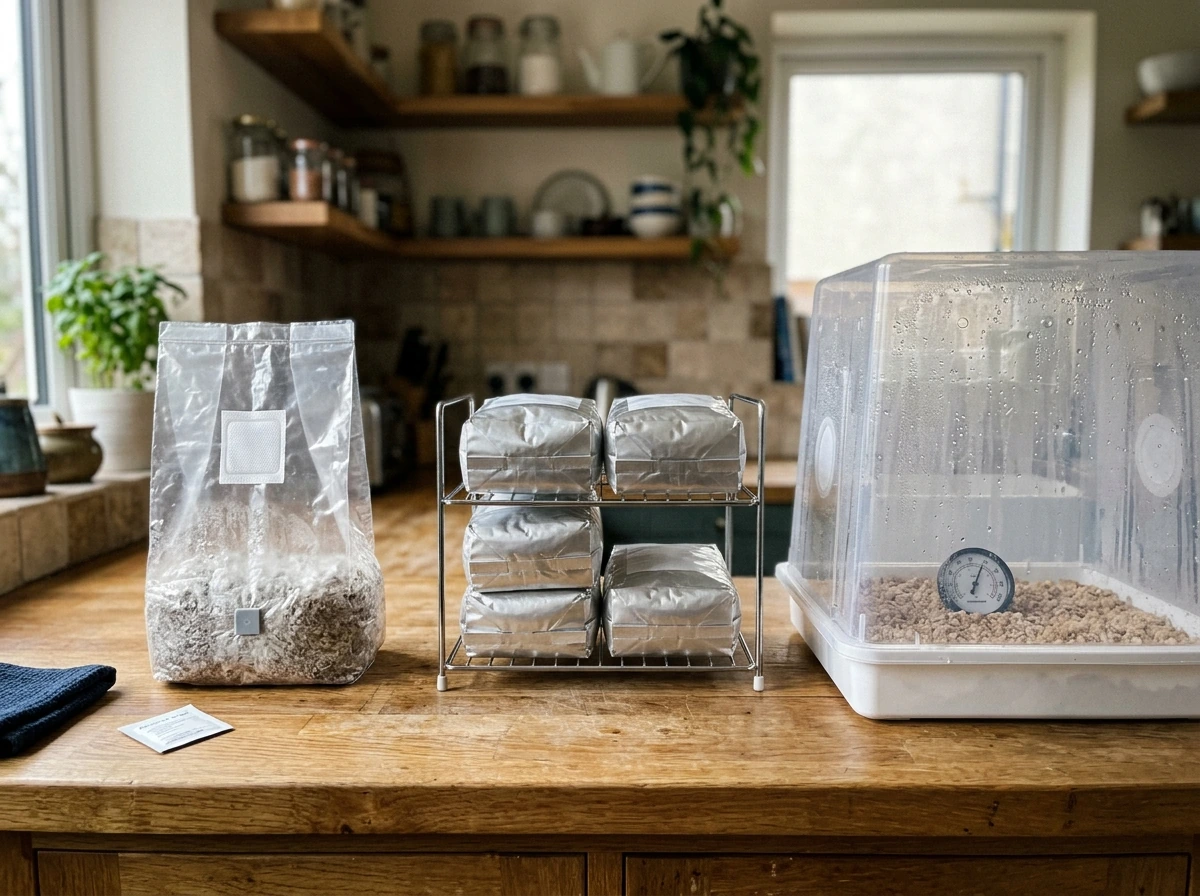
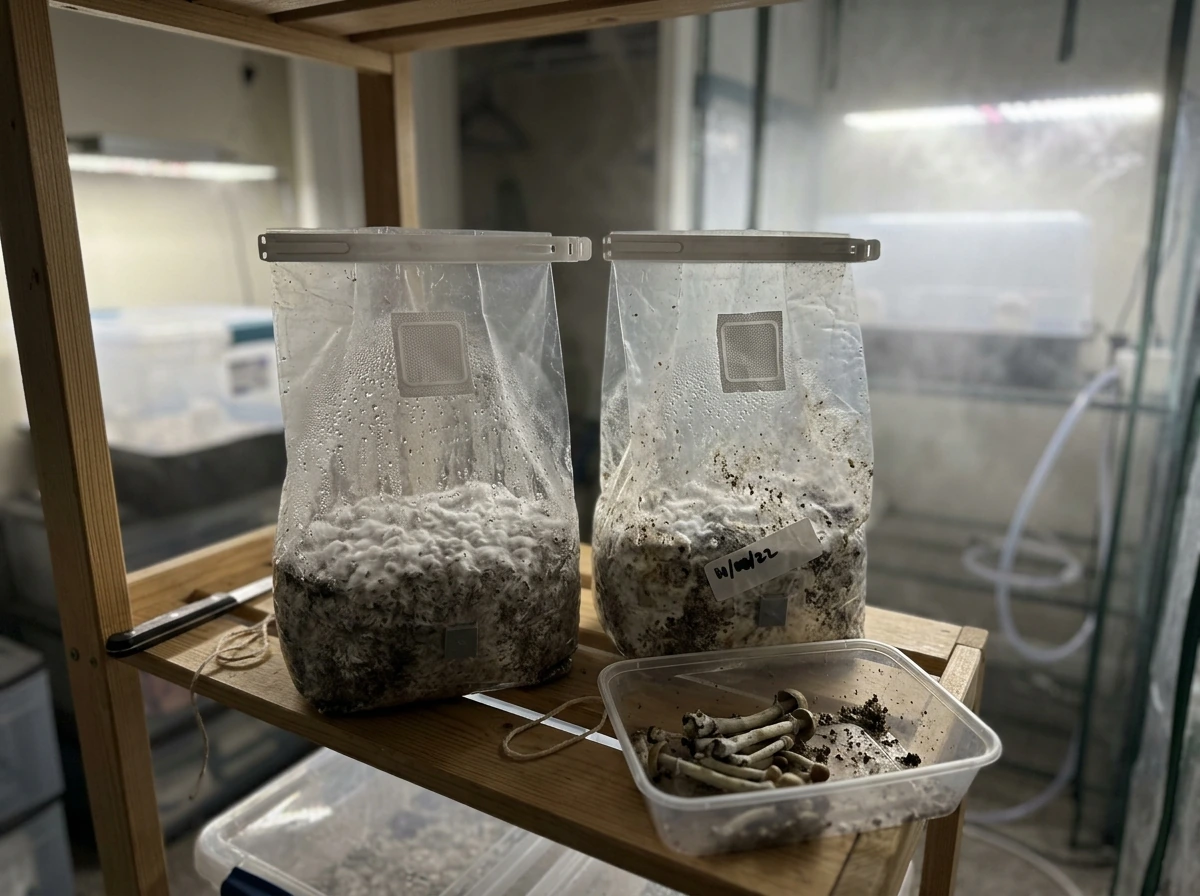
Mushroom grow bags are polypropylene bags that can withstand pressure cooker sterilization. They come in a few configurations. Spawn bags are pre-filled with sterilized grain substrate and have a filter patch for gas exchange, functioning much like jars but at larger volume. All-in-one grow bags contain both grain and a bulk substrate layer (like coco coir, straw, or sawdust) separated in a single bag, so you inoculate once and the mycelium moves through both stages without any transfers. Bulk substrate bags are larger bags you fill with your own colonized substrate after preparing it separately, often used to consolidate several jars of spawn into a single fruiting block. Each type slots into a different stage of the mushroom cultivation workflow.
Understanding where each method fits in the seven stages of cultivation matters here. Inoculation, spawn run (colonization), and fruiting are the three core stages every home grower deals with. Jars excel at the spawn run stage for grain. Grow bags handle everything from bulk colonization through fruiting, especially for wood-loving species or any setup where you want one container to do it all.
Ease of use, cost, and space (what's actually faster and simpler)
Jars have a lower startup cost and most beginners already have them at home. A case of wide-mouth quart mason jars runs about $12 to $15, and modified lids with injection ports and polyfill filters can be DIY'd for under $10 total. The downside is that jars require multiple transfers: grain spawn needs to be broken up and mixed into a bulk substrate, which means opening containers and creating more contamination exposure points. Each transfer is a risk window.
All-in-one grow bags eliminate that middle transfer entirely. You inoculate once, the mycelium colonizes the grain, then naturally moves into the bulk substrate layer without you touching anything. That closed workflow is genuinely easier for beginners. A quality all-in-one bag typically costs between $6 and $15 per bag depending on size and where you buy it, which is more per unit than a jar but includes the substrate, so the comparison isn't as lopsided as it looks.
Space-wise, jars stack efficiently on shelves during incubation and take up less footprint than bags. Grow bags, especially larger bulk substrate bags (5-pound or 10-pound blocks), need more vertical clearance and don't stack as neatly. For someone growing in a closet or a small shelf, jars for spawn and a single grow bag for fruiting is usually the most space-efficient hybrid approach. If you're doing all-in-one bags, you can stand them upright on a wire rack and they actually manage space decently well.
| Factor | Mason Jars | All-in-One Grow Bags | Bulk Substrate Bags |
|---|---|---|---|
| Startup cost | $12–$25 total | $6–$15 per bag | $3–$8 per bag (substrate extra) |
| Transfers required | Yes (grain to bulk) | None | One (spawn to bag) |
| Sterilization needed | Yes (pressure cooker) | Usually pre-sterilized | Yes (pressure cooker or pasteurization) |
| Space efficiency | High (stackable) | Moderate | Low–moderate |
| Best for | Grain spawn production | Beginner fruiting blocks | Bulk/large-scale fruiting |
| Reusability | Yes (many cycles) | No (single use) | No (single use) |
Contamination risk and how to prevent it
Contamination is the thing that kills most beginners' grows, and the method you choose directly affects how much exposure you have. The core principle is simple: every time you open a container or transfer substrate, you introduce contamination risk. Fewer transfers mean fewer risk windows.
With jars, the biggest contamination events are inoculation (injecting through the lid) and the grain-to-bulk transfer. Good injection port lids reduce risk at inoculation significantly. The transfer is harder to protect, and most growers use a still air box (SAB) or laminar flow hood for that step. Contamination in jars is also easy to spot early because you can see through the glass, so green or black mold patches are visible before they spread.
With grow bags, especially all-in-ones, the main inoculation point is the self-healing injection port on the bag. Because the bag stays sealed throughout colonization, contamination risk is lower during that phase. But if contamination does take hold inside a bag, it's harder to catch early because the opaque bag obscures what's happening. Pre-sterilized bags from a reputable supplier reduce the risk of substrate contamination from the start, which is a significant advantage over preparing your own substrate from scratch.
A useful rule of thumb for bags: if you don't see any white mycelium growth within 10 to 14 days after inoculation, something has gone wrong. Either the inoculation didn't take, temperatures are off, or contamination is suppressing growth. Don't wait weeks hoping it will recover. At the two-week mark with no visible colonization, it's safer to discard and restart.
For both methods, sterilization non-negotiables are: grain and hardwood substrates need full sterilization at 15 PSI in a pressure cooker (typically 2.5 hours for quart jars or bags up to 3 pounds). Pasteurization (160–180°F for 1–2 hours) is sufficient for straw and coco coir. Using field-capacity moisture (substrate should feel like a wrung-out sponge), working quickly during any transfers, and keeping your inoculation environment as clean as possible all reduce contamination rates meaningfully.
Yield and scalability
Per unit of substrate, grow bags consistently produce more than jars because they hold more bulk substrate. A standard 5-pound all-in-one bag or fruiting block can yield 100 to 200 grams of fresh mushrooms over multiple flushes, depending on species and conditions. A quart jar of grain spawn isn't designed to fruit directly from grain (though it can produce a small flush), so yield comparisons only make sense when you're comparing finished fruiting blocks of the same substrate weight.
Scalability heavily favors grow bags. If you want to go from 2 jars to 10 fruiting blocks, bags scale much more easily. Pre-sterilized grain bags are available in bulk, all-in-one bags can be ordered in packs of 10 or 20, and you can fill bulk substrate bags in batches without proportionally increasing your preparation time. Scaling jars means buying more equipment, more lids, more shelf space, and more sterilization runs.
One yield-relevant caveat worth keeping in mind: temperature management during colonization affects your final yields significantly. If your fruiting block or colonizing bag experiences temperatures below 55°F after weeks 4 or 5 of colonization, the mycelium may trigger premature pinning before full colonization is complete. That reduces your total yield because the substrate wasn't fully used before fruiting started. Keep incubation spaces between 70°F and 75°F for most species to avoid this.
Which mushroom types and setups benefit from each method
Oyster mushrooms
Oyster mushrooms (Pleurotus ostreatus and related species) are fast colonizers that thrive on straw and supplemented hardwood. They're ideal for grow bags because their aggressive colonization outcompetes contaminants and they fruit prolifically from bags with simple top-cut or side-cut fruiting. Jars can be used for oyster spawn, but these species really want bulk substrate volume. If you're growing oysters, start with bags.
Gourmet species (lion's mane, shiitake, king oyster)
These species do well on hardwood sawdust or supplemented sawdust blocks, which are best prepared and colonized in grow bags. A colonized hardwood block in a bag is the standard production format for lion's mane and shiitake in both commercial and home settings. Jars still work well for making grain spawn to inoculate those blocks, making this a natural jar-plus-bag workflow.
Cubensis and similar species (PF Tek, grain tek)
For species commonly grown with PF Tek, small jars (half-pint or pint) are the traditional starting point because they're easy to manage and birth cakes directly from the jar without extra equipment. All-in-one bags are also a solid option for these species, especially if you want to skip the birthing/dunking process. The choice here often comes down to personal preference and how hands-on you want to be.
Beginner vs. experienced growers
Beginners who want the simplest possible entry point should start with all-in-one grow bags. There's no substrate preparation, no sterilization equipment needed, and no transfers. You inject, you wait, you fruit. Experienced growers who want control, efficiency, and the ability to optimize each stage separately will almost always run a hybrid system: jars for spawn production, bags for bulk fruiting.
Step-by-step workflow for each method
Grain jar workflow (spawn production)
- Prepare grain: rinse and simmer rye berries, oats, or popcorn corn until tender but not split. Drain and dry the surface thoroughly.
- Fill jars to about 2/3 capacity. Add a polyfill layer or injection port lid, then seal with foil during sterilization.
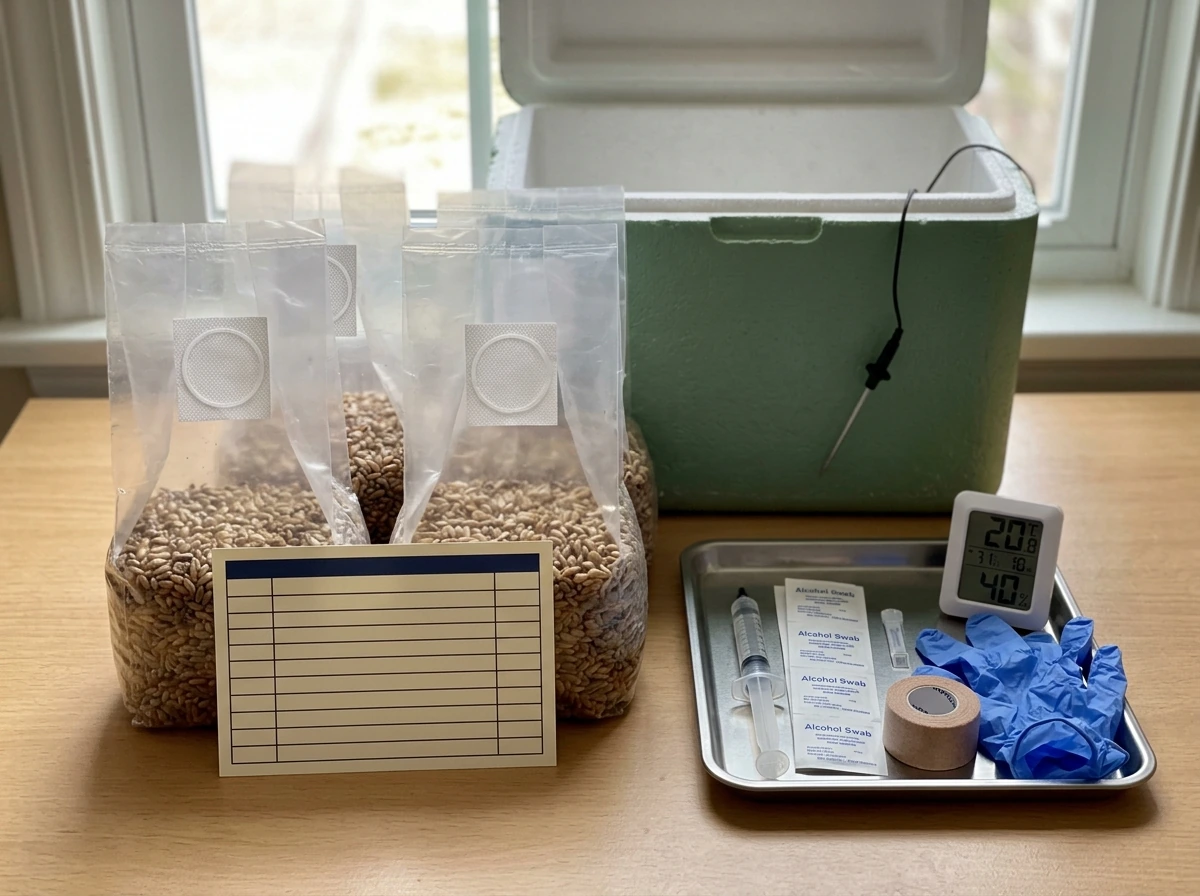
- Pressure cook at 15 PSI for 60–90 minutes (quart jars). Let cool completely to room temperature before inoculating (12–24 hours).
- In a still air box or in front of a flow hood, inject 1–2 ml of liquid culture or spore solution per jar through the injection port.
- Incubate at 70–75°F out of direct light. Break and shake the jar once mycelium covers about 30% of the grain to distribute colonization.
- Colonization is complete when mycelium fully covers all grain with no visible wet or discolored spots. This typically takes 10–21 days depending on species.
- Use colonized grain to inoculate bulk substrate bags or mix into a monotub for fruiting.
All-in-one grow bag workflow (beginner-friendly)
- Source a pre-sterilized all-in-one bag. Check that the filter patch is intact and the bag has no visible damage or discoloration.
- Flame-sterilize your needle, let it cool for 5 seconds, then inject 2–4 ml of liquid culture or spore solution through the injection port.
- Massage the bag gently to distribute the inoculant. Leave the bag sealed and place in a warm, stable location (70–75°F) out of direct sunlight.
- Check for white mycelium growth after 5–7 days. If no growth is visible by day 14, something is wrong. Do not open the bag to check.
- Once grain is fully colonized (10–21 days), break up the grain layer by massaging the bag and mix it into the bulk substrate layer below.
- Continue incubating at the same temperature until the entire bag is white with mycelium.
- Do not open the bag until you see mushroom pins forming. Once pins appear, cut a slit or X at the top of the bag to allow fresh air exchange (FAE) and let the pins develop.
- Harvest when caps begin to curl upward at the edges but before they fully flatten. Twist and pull cleanly at the base.
Bulk substrate bag workflow (experienced growers)
- Prepare bulk substrate: sterilize hardwood sawdust blocks (15 PSI, 2.5 hours per bag), or pasteurize straw/coco coir (160–180°F for 1–2 hours). Cool to room temperature.
- In a clean environment, open the bulk substrate bag and add colonized grain spawn at a 1:5 to 1:10 spawn-to-substrate ratio by weight. Mix thoroughly.
- Seal the bag with an impulse sealer or fold and clip tightly.
- Incubate at 70–75°F until fully colonized (14–30 days depending on species and supplement level).
- Transfer to fruiting conditions: 65–72°F, high humidity (85–95% RH), fresh air exchange 4–6 times per day.
- For hardwood blocks, cut the bag away and expose the block surface to trigger pinning. For straw or coir, cut fruiting holes in the sides of the bag.
- Harvest, then soak the spent block in cold water for 6–12 hours to rehydrate for subsequent flushes.
Troubleshooting guide: common failures in bags vs jars
| Symptom | Likely Cause | Fix |
|---|---|---|
| No visible mycelium after 14 days (bag or jar) | Dead culture, wrong temperature, or failed sterilization | Discard and restart; verify spore syringe/LC is viable and incubation temp is 70–75°F |
| Green, black, or pink patches in jar | Contamination (trichoderma, bacteria) | Seal jar in plastic bag and discard outside; audit sterilization time and moisture levels |
| Contamination in grow bag (smell or visible mold) | Compromised filter patch or injection port, insufficient sterilization | Discard; source bags from a reputable supplier; do not reuse bags |
| Colonization stalls at 30–50% in bag | Temperature too low, poor inoculation distribution | Break and shake the bag to redistribute mycelium; move to warmer location |
| Substrate cracking or pulling away from bag walls | Moisture loss during long colonization | Add a small amount of sterile water before stalling worsens; use field-capacity moisture from the start |
| Pins form but abort before reaching harvest size | CO2 buildup, insufficient humidity, or temperature swings | Increase FAE, mist walls of fruiting chamber (not pins directly), stabilize temperature |
| Grain in jars clumps and doesn't break up easily | Too wet or contamination early stage | Break up while grain is still looser; if slimy or smells off, discard |
| Premature pinning inside bag before ready to fruit | Temperature dropped below 55°F during colonization | Move to warmer space immediately; yields may be reduced but block can still fruit |
Which one should you choose today? A decision checklist
Here's a direct framework for making your decision right now, based on your situation:
- You're a first-time grower with no pressure cooker: choose all-in-one pre-sterilized grow bags. No equipment investment, no substrate prep, lowest contamination exposure.
- You want to grow oysters, lion's mane, or shiitake at home: grow bags are your primary tool. Jars can support spawn production if you want to scale.
- You want to do PF Tek or work with pint-scale inoculations: mason jars (half-pint or pint, wide-mouth) are the right starting point.
- You already have a pressure cooker and want to scale up: use jars for grain spawn and bulk substrate bags for fruiting blocks. This hybrid approach gives you the most control and the best economics.
- You're growing in a small space (closet, shelf): start with 2–4 all-in-one bags on a wire rack. Add a basic humidity tent or shotgun fruiting chamber when you're ready to fruit.
- You've had contamination problems with jars: switching to pre-sterilized all-in-one bags removes two major risk points (sterilization and transfer). Give bags a try before giving up.
- You want to produce your own grain spawn long-term: invest in a pressure cooker, quart mason jars with injection port lids, and a still air box. This setup pays for itself quickly.
- You're unsure about reusing bags: don't. Grow bags are single-use items. Jars, by contrast, can be reused for many cycles if properly cleaned and re-sterilized.
What to buy or prepare next
If you're going the all-in-one bag route, look for bags with a grain layer of at least 500 grams and a bulk substrate layer of hardwood sawdust or coco coir. Filter patch size matters: look for a 0.2-micron filter patch for proper gas exchange without contamination risk. For a deeper look at specific product options, the guides on the best all-in-one mushroom grow bags and best options discussed on growing communities are useful starting points.
If you're going the jar route, get a case of wide-mouth quart mason jars, a bag of rye berries or oats from the grocery store, a pressure cooker rated for at least 15 PSI and large enough for at least 4 quarts at a time, and a liquid culture syringe or spore syringe from a reputable vendor. Lid modifications (injection port plus polyfill) can be DIY'd with a $5 supply kit or purchased pre-made. That full setup runs $80 to $130 and supports indefinite spawn production.
Either way, once you've got colonized substrate ready to fruit, the method you choose for fruiting matters just as much as how you grew the spawn, so it helps to review the best psilocybe cubensis grow bag options before you start. Either way, once you've got colonized substrate ready to fruit, the method you choose for fruiting matters just as much as how you grew the spawn, so it helps to review the best psilocybe cubensis grow bag options before you start. If you're weighing whether to fruit in a bag versus moving to a [monotub vs grow bag](/mushroom-grow-bags/mushroom-grow-bag-vs-monotub), that's a separate decision covered in detail elsewhere on this site and worth thinking through before your first block is fully colonized. monotub vs grow bag
FAQ
Can I fruit directly from grain in a jar (without transferring to bulk)?
Yes, but expect small, inconsistent results. Grain jars are mainly for spawn run, and fruiting grain depends heavily on species and how densely the grain was colonized. If you want reliable yields like the article describes for bag blocks, use grain jars to make spawn, then transfer to a pasteurized or sterilized bulk substrate.
What size is better for the “spawn bag” or “all-in-one” part, 2 to 3 pounds versus larger blocks?
Smaller blocks colonize faster and are easier to manage in tight incubation spaces, but they dry out more quickly once you move to fruiting. Larger blocks usually give steadier multi-flush performance, yet they require better temperature control and more vertical clearance. If you are space-limited or new, start with smaller all-in-one bags to reduce risk from uneven heating.
If my bags are opaque, how can I tell whether colonization is progressing without opening them?
Use a schedule check and, when possible, rely on the location of the injection port plus any clear viewing panels some bag designs include. If the bag design is fully opaque, track time and temperature, and do not “peek” by opening. Also watch for early stalled growth signals, the 10 to 14 day no-white-growth rule is your practical decision point.
What’s the safest way to handle a contaminated jar or bag when it happens?
Isolate it immediately in a separate area, seal it in a trash bag, and clean the surrounding area before you resume work. With jars, you can sometimes spot contamination early through the glass, but the safest move is still to discard once growth is visibly off. Avoid trying to “salvage” partially contaminated blocks, because surviving contaminants often reappear later and waste clean substrate.
Does using injection ports on jars make them as contamination-safe as grow bags?
It improves inoculation safety, but the jar method still has an extra risk window during the grain-to-bulk transfer. Even with a good injection port, you will open containers later, create more airflow disturbance, and handle substrate that has to be mixed and loaded. Grow bags mainly win by keeping the workflow closed through colonization.
How long should incubation last before deciding something is wrong?
Time depends on species and temperature, but the article’s practical safeguard is the 10 to 14 day check for visible mycelium in bags. For jars, if you see no meaningful progress after your expected spawn-run window (also based on species and incubation conditions), treat it as a failure rather than waiting. Consistent temperature is usually the first variable to correct.
Can I reuse grow bags to save money, and when is it not worth it?
In general, reusing bags is unreliable because contamination can remain after a failed run, and the bag material and filter integrity may degrade. Even if you can sterilize the bag again, you introduce additional steps and risk that offset the cost savings. For a first-timer workflow, it is usually better to plan on one bag per attempt, then reuse only equipment that is clearly designed for reuse.
What temperature and airflow issues most often cause problems after the block is fully colonized?
The biggest mistake is triggering early pinning by letting the block cool below the safe range during late colonization. Another common issue is poor fresh-air exchange once fruiting begins, which can cause malformed fruits or slow development. Keep colonization warm and stable, then switch to fruiting conditions promptly once the block is ready.
Are grow bags better for all species, or are there exceptions where jars are clearly preferable?
Grow bags are a strong default for wood-loving species and for anyone wanting a single-container workflow. Exceptions include situations where you specifically want PF Tek style transfers or you prefer birthing cakes directly from jars. For those use cases, jars reduce equipment complexity and can fit your workflow better than bags.
Which method is better if I want the lowest ongoing cost per harvest, not just lowest startup cost?
Grow bags often win on cost per usable fruiting block because they reduce transfers and scale efficiently, especially when you consolidate spawn into larger blocks. Jars can look cheaper upfront, but you pay later in equipment, additional lids, more handling time, and more contamination exposure points. If you plan multiple cycles, the reduced handling of bags usually becomes more economical.
Find reliable places to buy mushroom grow bags plus exact storage steps to prevent drying, mold, and contamination.
Reviews and selection guide for the best Psilocybe cubensis grow bag, with criteria, setup steps, and troubleshooting.
Learn if you can reuse mushroom grow bags safely, how to assess contamination, and the steps to clean, dry, and rerun bl