Transferring a colonized best all-in-one best psilocybe cubensis grow bag into a monotub best psilocybe cubensis grow bag is one of those steps where getting the timing and technique right makes or breaks your entire fruiting run. Done well, you move a fully colonized substrate into a controlled fruiting environment and get rewarded with a healthy first flush. Done sloppily, or too early, you open the door to contamination, stalled colonization, and a lot of frustration. This guide walks you through the whole process: when to pull the trigger, how to set everything up, how to handle the transfer itself, and what to do in the hours and days after. where to buy mushroom grow bags
How to Transfer a Mushroom Grow Bag to a Monotub

Marcus Holloway
24 Mar 2026
When to transfer vs. when to wait
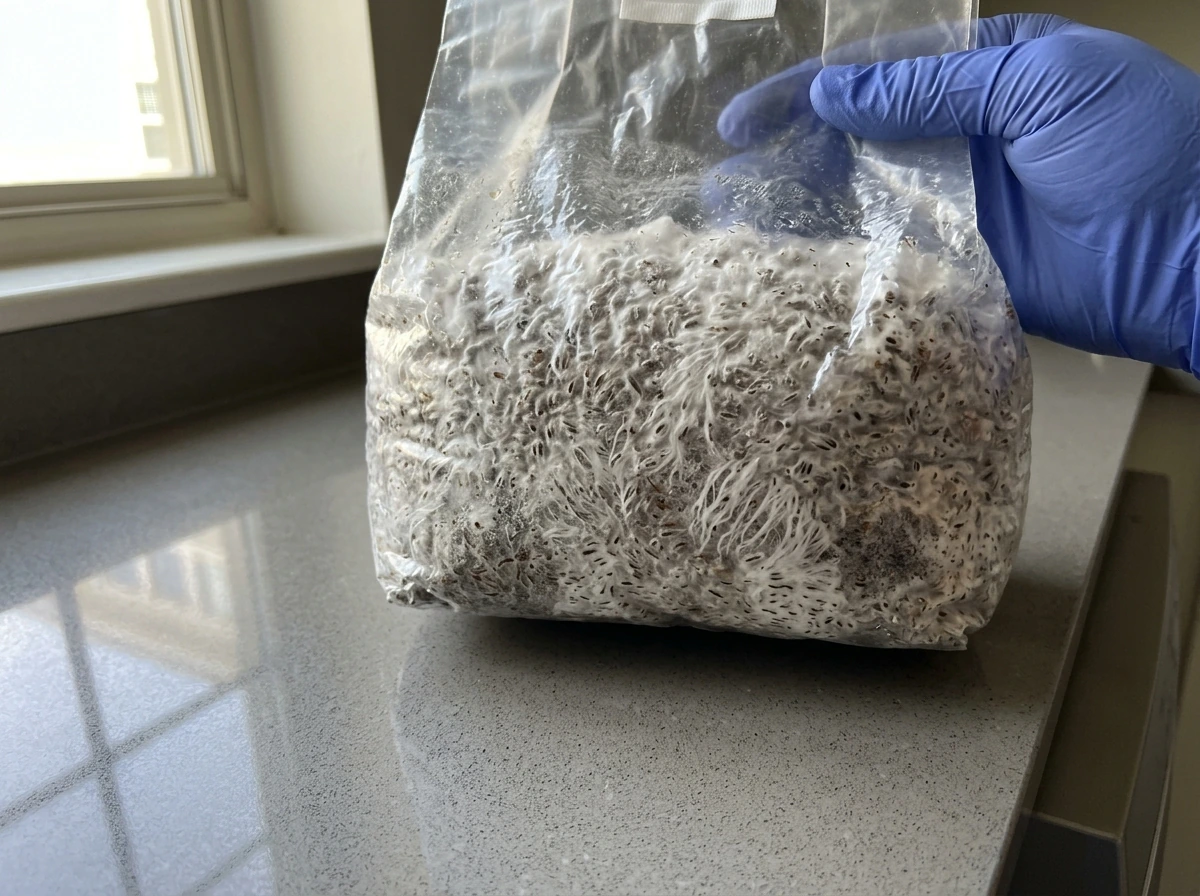
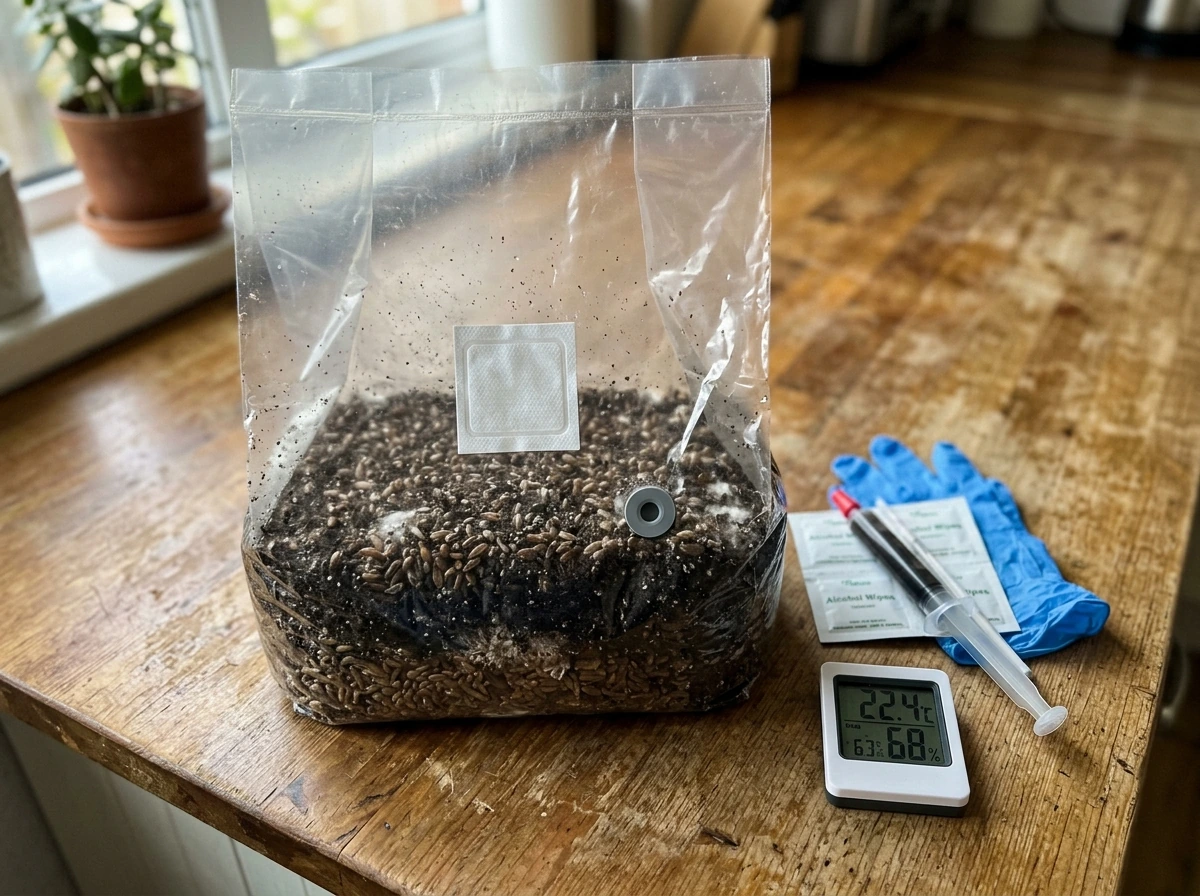
The single most important rule here is patience. Transfer only when your grow bag is fully colonized, meaning the mycelium has completely consumed the substrate and you see dense, white growth throughout. The temptation to move at 60 or 70 percent colonization is real, especially when you start seeing early pinning activity inside the bag, but doing so consistently leads to unpredictable results. Partial colonization leaves uncolonized pockets in your substrate that are wide open to contamination once you break the bag open and expose everything to the environment.
Full colonization is your signal, not partial colonization plus excitement. When you look at the bag, you want to see white mycelium covering every visible surface of the substrate with no green, black, or pink spots and no obviously brown or uncolonized sections. Some growers also wait a few extra days after apparent full colonization to let the mycelium consolidate, which gives the substrate a firm, almost cake-like structure. That consolidation makes the break-up step during transfer cleaner and easier.
If you are already seeing pins forming inside the bag, that is actually a useful cue that the substrate is ready. But do not let early pinning rush you into moving a partially colonized bag. Fully colonized plus early pins is a green light. Partially colonized with a few pins showing is still a wait.
Prep checklist: tools, monotub setup, and sterilization hygiene
Getting your workspace and monotub ready before you touch the grow bag is non-negotiable. Contamination during transfer almost always traces back to a rushed or incomplete prep step, not the transfer itself. Here is what you need assembled and ready before you open anything.
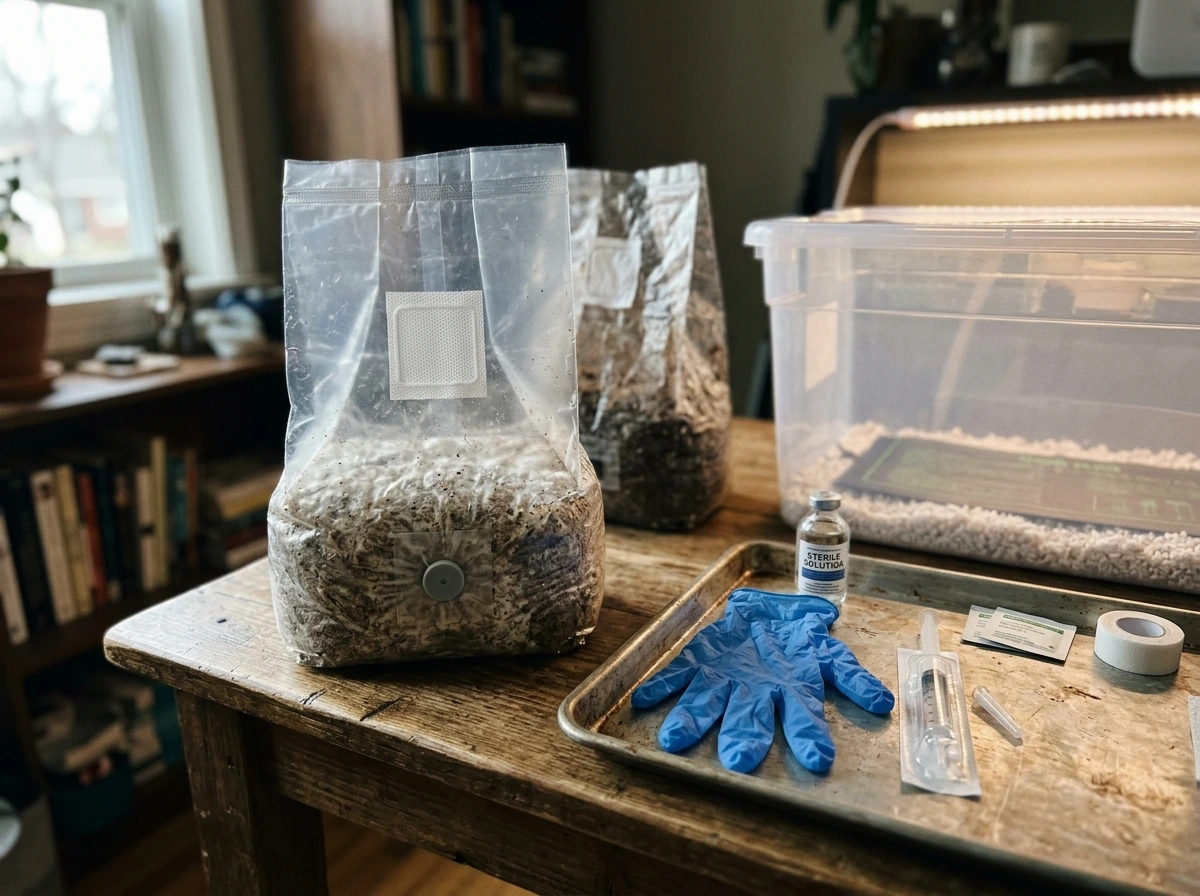
Tools and supplies
- A still air box (SAB) or laminar flow hood for doing the actual transfer
- 70% isopropyl alcohol in a spray bottle
- 3–5% hydrogen peroxide in a separate spray bottle
- Nitrile gloves (two pairs is smart)
- Clean paper towels
- A large monotub (a 54–66 qt clear storage tote is a common choice)
- Polyfill or micropore tape for the tub's air exchange holes
- A spray bottle filled with clean water for post-transfer surface management
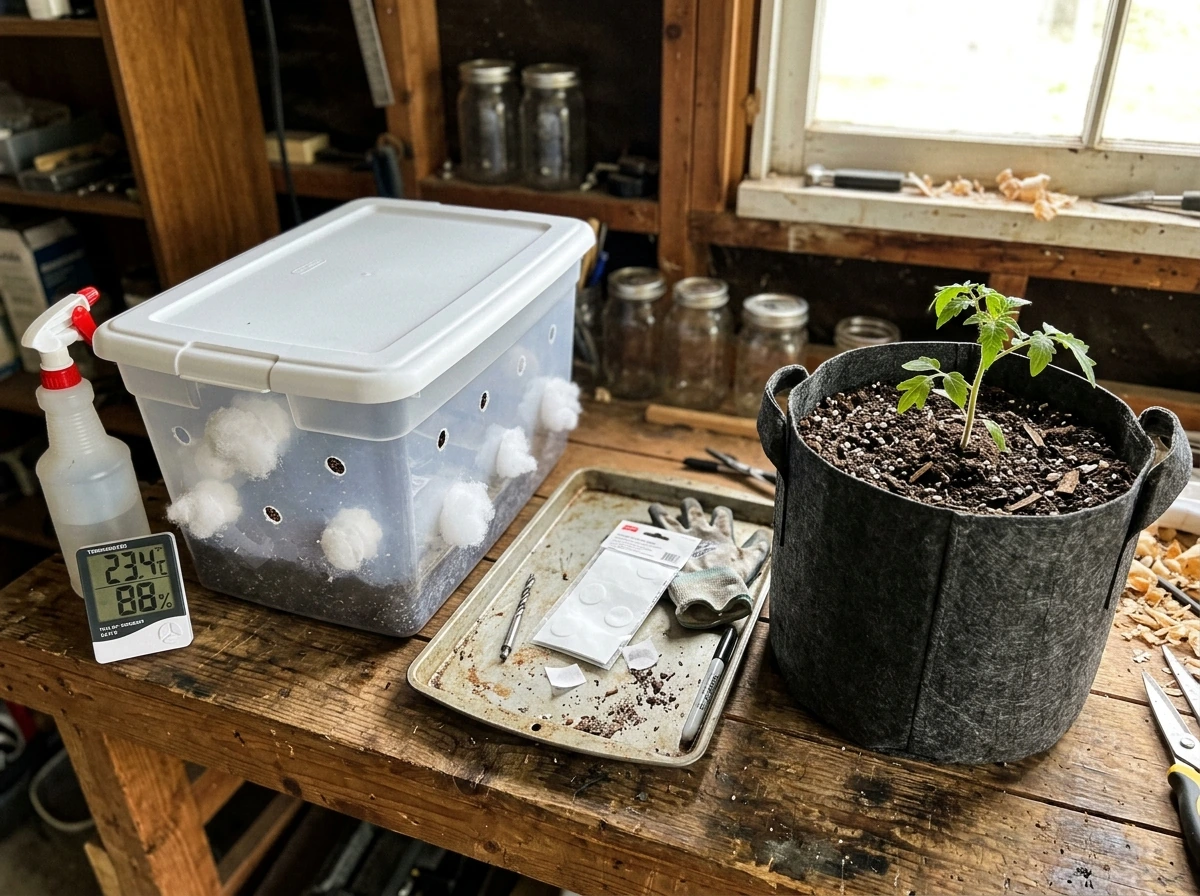
Monotub setup
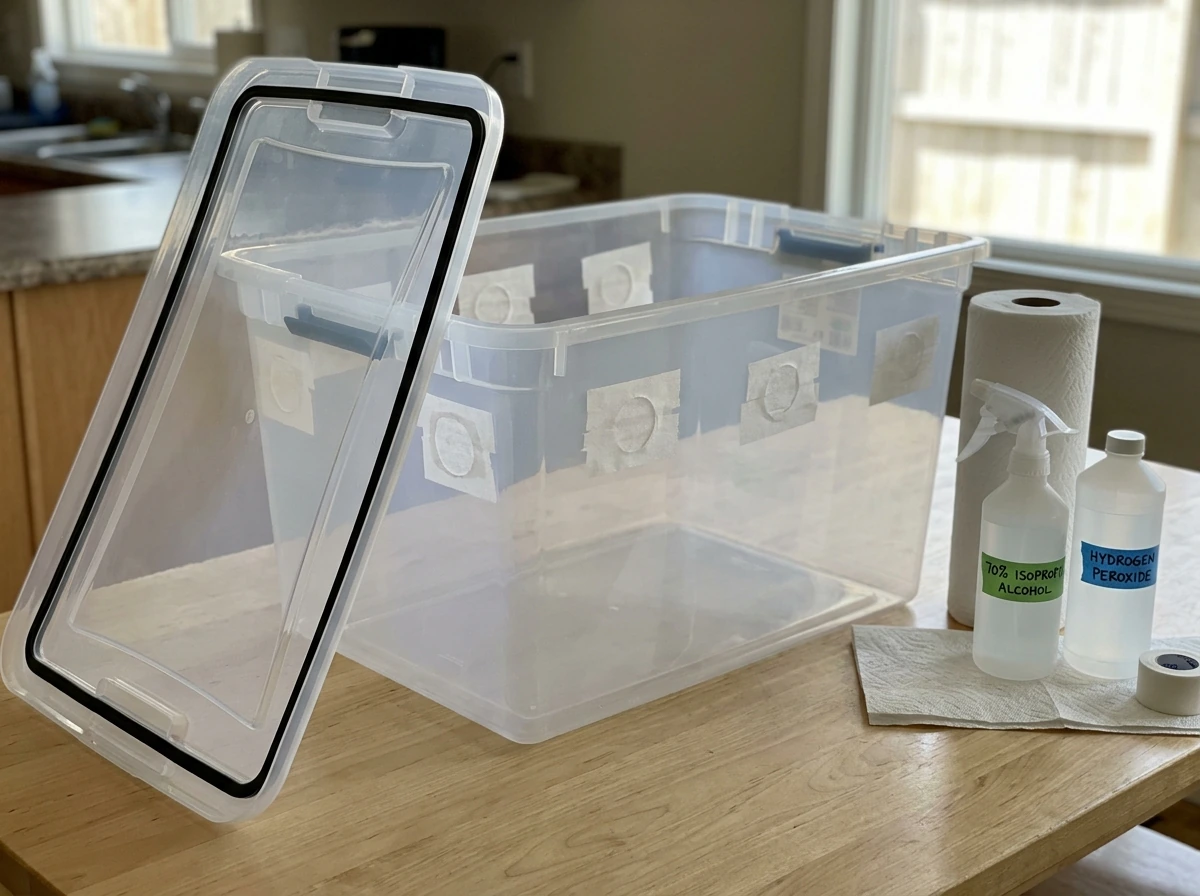
Your monotub should already have its fresh-air exchange (FAE) holes drilled and covered before transfer day. A standard setup uses holes on the sides near the top of the tub, covered with polyfill stuffed firmly into the holes or sealed with micropore tape. The goal is passive gas exchange that prevents CO2 buildup without letting unfiltered room air blast across your substrate surface. If your tub is new, wipe the interior with 70% isopropyl alcohol and let it off-gas for at least 30 minutes before use. If it is a reused tub, treat it more aggressively, covered next in how to can you reuse mushroom grow bags, in the cleanup section at the end.
Sterilization and hygiene
Wipe the outside of the grow bag down with 70% alcohol and dry it with a clean paper towel before bringing it into the SAB or near the flow hood. Spray your gloves with alcohol every time you re-enter the work area or touch a non-sterile surface. The key discipline here is working quickly once anything is open and exposed to air. Every second your substrate is open is a second for contaminants to land. Laminar flow hoods are more capable than still air boxes for high-volume spawn production work, but a properly used SAB is completely adequate for a single-bag transfer to monotub at home.
How to handle and acclimate the colonized grow bag before transfer
Bring your colonized grow bag to room temperature if it has been stored anywhere cooler, like a basement or a cold shelf. You want the substrate to be at ambient room temperature before you open anything, both because cold substrate can create condensation issues in the tub and because warm, active mycelium handles the stress of transfer better than cold, dormant mycelium.
Before opening the bag, spend a minute massaging it gently through the outside of the plastic to start breaking up the colonized substrate into smaller chunks. This is called crumbling or breaking up the cake, and doing it while the bag is still sealed reduces your exposure time once the bag is open. You are aiming for pieces roughly the size of a golf ball or slightly smaller, not dust, and not one solid block. A few medium chunks mixed with some finer material is ideal for even distribution in the tub.
Also do a final contamination check at this stage. Look through the bag for any green (trichoderma), black, pink, or slimy sections. If you find any, that bag does not go into your monotub. No exceptions. One contaminated bag will ruin an entire tub within days.
Step-by-step transfer procedure

- Set up your SAB or get positioned at your flow hood. Spray the interior of the SAB with 70% alcohol, let it settle for 1–2 minutes.
- Put on gloves and spray them with 70% alcohol. Place your prepped monotub and the colonized grow bag inside or directly in front of the flow hood.
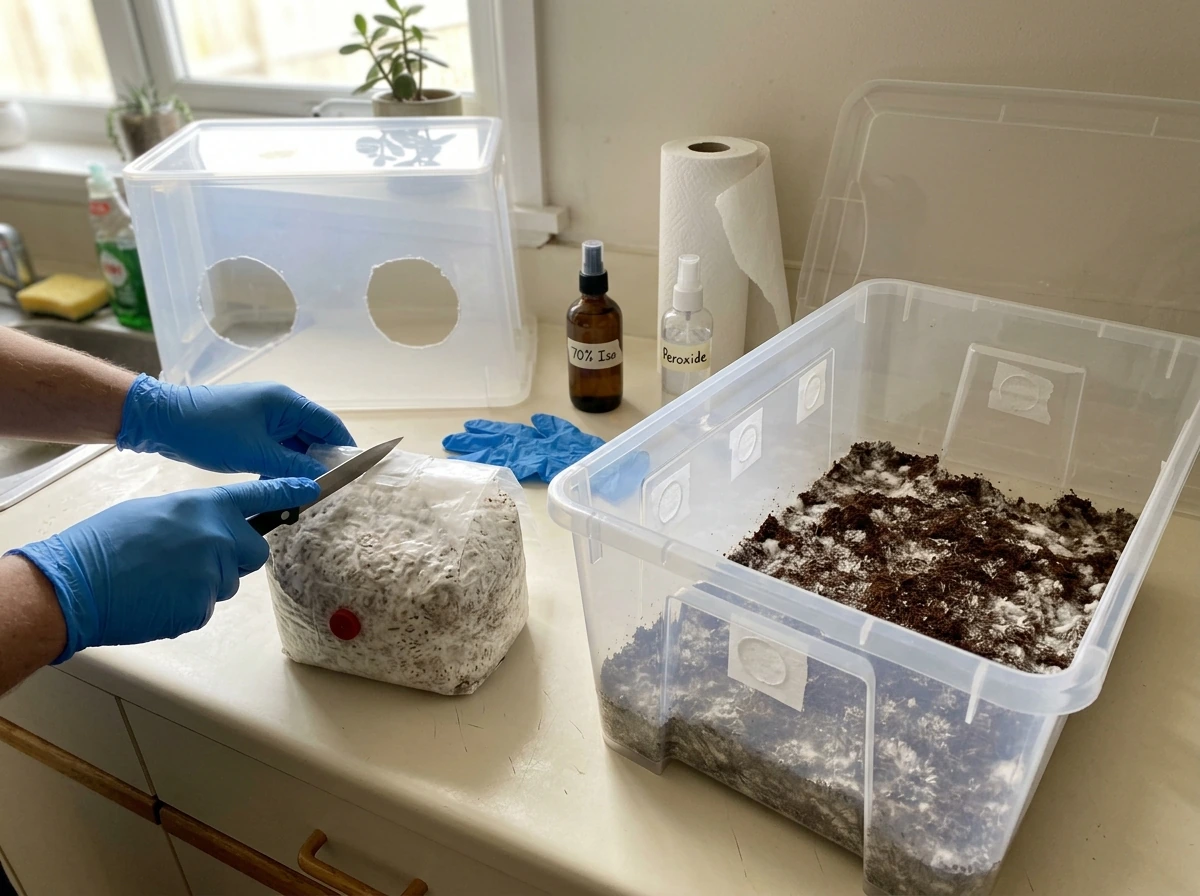
- Cut or open the grow bag. If it has a filter patch at the top, cut below the patch. Use scissors wiped with alcohol, and open the bag in one clean motion.
- Pour or scoop the broken-up substrate into the monotub. If your bag is grain spawn that you are combining with a bulk substrate (like pasteurized coco coir and vermiculite), layer it: a base layer of bulk substrate, then your grain spawn distributed evenly across it, then a final casing or top layer of bulk substrate. Target a total substrate depth of 3–5 inches.
- If transferring an all-in-one bag that is already colonized grain-plus-bulk substrate, simply pour the contents in evenly and spread them with a gloved hand into a level surface. Do not pack it down hard.
- Once the substrate is evenly distributed, lightly mist the surface only if it looks dry. If your field capacity is correct coming out of the bag, you likely will not need to mist at all.
- Place the lid on the tub and move it to your fruiting environment. Do not open it again unless you have a specific reason to.
The whole open-transfer-close sequence should move as fast as you can manage without being sloppy. Minimizing exposure time is your primary contamination defense once the bag is open.
Moisture, fresh air, and surface conditions right after transfer
Field capacity is the moisture target you are aiming for, both going into the tub and managing after transfer. Field capacity means the substrate is moist and feels damp to the touch but does not drip freely when squeezed. The squeeze test: grab a small handful and squeeze firmly. You might see a slow drip or a few drops ring out, but water should not stream or flow. If it streams, your substrate is too wet. If nothing comes out and the substrate feels dry or crumbly, it is too dry.
Right after transfer, resist the urge to mist the surface immediately. If your substrate was at field capacity in the bag, it should still be at field capacity in the tub. Over-misting immediately after transfer is one of the most common beginner mistakes, and it leads directly to pooling water on the surface, which stalls colonization and can collapse hyphal knots that are just beginning to form. Let the tub sit and manage its own moisture for the first 48–72 hours.
For humidity targets, you want to be in the 85–95% relative humidity range during colonization and early pinning. The tub's closed or semi-closed environment usually handles this passively if your substrate moisture is correct. During active pinning, some growers nudge humidity toward the higher end of that range, up to 95–100%, with very light misting if the surface looks like it is drying out.
For CO2 and fresh air exchange, the goal during early post-transfer colonization is to keep CO2 from building up to the point where it inhibits pinning. A CO2 level below 1,000 ppm is a solid target for initiating pins, with air exchange rates of roughly 4–7 times per hour being cited as effective for fruiting conditions. In practice, passive polyfill holes on a well-sized tub handle this without fans or active equipment for most home growers. As the mycelium approaches full consolidation and you start seeing primordia forming, you can crack the lid slightly or fan the tub briefly once or twice a day to provide a fresh-air trigger and CO2 drop, which helps stimulate pinning.
Common problems after transfer and how to fix them fast
Contamination appearing on the surface
Green mold (trichoderma) showing up on the surface within the first few days is the most common and most serious problem. If it is a small, isolated spot on the surface and has not penetrated deep into the substrate, some growers try pouring 3–5% hydrogen peroxide directly on the affected area and monitoring closely. If the contamination spreads, is already large, or appears below the surface, the tub is compromised and should be disposed of outside the grow area to prevent spore spread. Do not open a contaminated tub inside your house more than necessary.
Stalled or slow colonization
If mycelium stops visibly spreading after transfer and the substrate looks unchanged for several days, the most likely culprits are substrate that is too wet, too cold, or was not fully colonized before transfer. Check your room temperature (ideal colonization range for most species is roughly 70–75°F), look for any pooled moisture on the surface, and make sure your FAE holes are not completely blocked. If the tub is too wet, remove the lid or prop it open briefly to allow some surface evaporation, then reassess over 24 hours.
Pooling water on the substrate surface
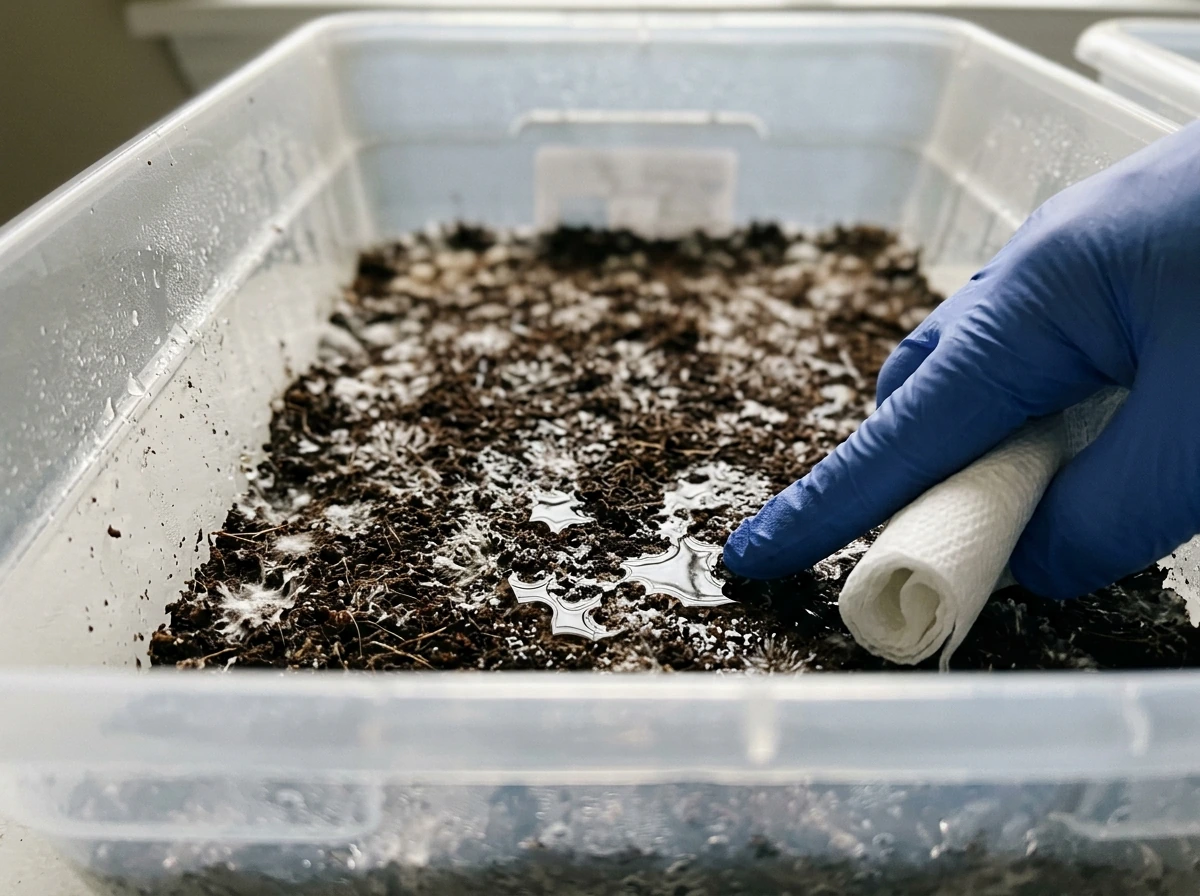
Pooling is almost always a sign of over-misting or substrate that went into the tub too wet. Standing water on the surface creates anaerobic pockets that stall mycelial growth and invite bacteria. To fix it, tilt the tub slightly to drain pooled water toward one corner and soak it up with a clean paper towel held at the surface (try not to drag the towel across the substrate). Then allow more FAE by cracking the lid or fanning. Do not add any more moisture until the surface looks dry and the tub has re-equilibrated.
Knots shrinking or pins not developing
Hyphal knots that form and then shrink back are typically caused by a sudden humidity drop (from too much fresh air or a lid left off too long) or, ironically, from over-misting that drowned the forming pins. If you misted and left the lid open overnight and your knots collapsed, close the tub back up, let humidity recover for 24–48 hours, and hold off on misting. The mycelium will usually re-form knots if the contamination risk is low and conditions stabilize.
Best practices for repeat transfers and safe cleanup
After a successful flush (or a failed run you are clearing out), cleaning the monotub thoroughly before the next cycle is essential. Leftover substrate, old pins, and spent mycelium harbor bacteria and competing molds that will contaminate your next transfer immediately. Dump and dispose of all substrate outside, scrub the tub interior with hot soapy water, then wipe down with 70% isopropyl alcohol. For extra protection on a tub that had any contamination in it, use a diluted bleach solution (around 10% bleach in water, with adequate contact time of at least 10 minutes) followed by a full rinse and dry. Hydrogen peroxide is another solid option for surfaces since it breaks down into oxygen and water and leaves no chemical residue, making it safer to use in spaces where you will be growing food.
For repeat transfers, treat every run as if it is your first. Wipe the outside of any new grow bag with alcohol before it enters your workspace, re-sterilize your SAB or flow hood area, use fresh gloves, and do not reuse paper towels or alcohol sprayers that have been sitting open between sessions. Cross-contamination between runs is a real risk, and the discipline that protected your first successful transfer is the same discipline that protects every run after it.
One additional tip for growers running multiple tubs: keep your transfer area and your fruiting area physically separate if you can. Moving between active fruiting tubs (which are releasing spores and potentially harboring late-stage contamination) and your clean transfer workspace is a fast way to introduce problems. Even washing your hands and changing clothes between the two areas makes a meaningful difference in long-term grow room cleanliness.
If you are still deciding whether to commit fully to the monotub approach or want to compare it against staying in a grow bag through fruiting, that is a separate question worth thinking through carefully. The grow bag versus monotub choice involves real tradeoffs in yield, effort, and equipment investment. But once you have decided the monotub is the right system for your setup, the transfer process described here gives you a solid, repeatable workflow to build on.
FAQ
Can I transfer a mushroom grow bag to a monotub if it has started pinning inside the bag?
No. You should transfer only when the bag is fully colonized throughout, with no obvious green, black, pink, or slimy areas. If you wait for some “early” pinning, treat it as a cue that the bag is closer, not proof that the whole cake is colonized and safe to open.
What should I look for to confirm full colonization, besides “mostly white”?
Check for consolidation and uniform whiteness first. If you can see uncolonized brown sections or any suspect discoloration, keep waiting. Also allow a brief extra hold once it looks fully white, because a firmer, more consolidated substrate breaks into cleaner chunks and distributes more evenly in the tub.
Should I mist right after transferring the grow bag into the monotub?
It depends on your tub moisture and how field-capacity the substrate already is. If you mist immediately and the surface stays wet or glossy, leave it alone and let it re-equilibrate with normal FAE. The practical fix for beginners is to avoid adding any water until the surface loses pooling and the top layer looks stable for a day.
How long can I leave the lid cracked or off if I’m trying to fix CO2 issues?
If your monotub has been sitting with the lid on for a while, fresh air can be uneven across the surface. In that case, do small, controlled adjustments instead of leaving the lid off for long periods, for example crack it briefly once or twice a day rather than hours at a time. Sudden extended lid-off time is a common cause of knot shrinkage.
How do I tell if CO2 is too high without a CO2 meter?
If you don’t have a way to measure ppm, you can use behavior cues. Before pinning, you should avoid both heavy fresh-air blasting and condensation. After transfer, keep FAE consistent through the polyfill holes, and only use brief lid cracking as a trigger when you see primordia starting, not before.
What if I see a green spot, but it doesn’t spread immediately?
Chances are high it will not be worth continuing. Green spots that are spreading or appear to penetrate below the surface typically indicate a compromised tub. If you must decide quickly, treat any suspect growth that expands over 24 hours as a fail and remove the tub from the grow area to prevent spore spread.
What if the tub looks stalled for several days even though the grow bag was fully colonized?
Use room-temperature substrate and room. If the bag was stored cold, let it come to ambient before opening. After transfer, check for cool tub surfaces, since cold slows mycelium movement and can make your first growth look stalled even when moisture is correct.
How can I tell if my substrate is too wet versus just colonizing slowly?
Overly wet substrate usually shows as pooling, a glossy surface, or water that smears when you tilt or touch nearby areas. The quick corrective action from there is to reduce surface moisture, improve FAE slightly, and wait 24 hours before making another change so you can tell whether the tub is trending better.
If I already have standing water, what is the safest fix right away?
Your best option is to remove as much excess water as possible without disturbing the cake. Tilt to gather pooling water to one corner and blot at the surface, then increase FAE briefly. Avoid adding hydrogen peroxide or misting again unless you can clearly see what you are correcting, because extra moisture tends to repeat the problem.
Why do hyphal knots form then shrink back, and what should I do next?
If your knots shrink after a humidity swing, stabilize first. Close the tub, stop misting for at least a full day, and ensure FAE holes are open, not blocked. If the surface is drying too fast, adjust toward very light misting only when you notice it is actually drying, not when it merely looks matte.
Can I save the monotub if the grow bag shows contamination only on a small area?
If you see pink, black, or slimy patches at the bag stage, do not use it at all. Those signs mean the contamination is already present in the substrate or on the surface, and transferring it gives it a better chance to spread in the monotub.
Is it safe to reuse a monotub after contamination, and what’s the correct order of cleaning?
Yes, but only after it is fully cleaned. After a contaminated or failed run, scrub first, then disinfect, then rinse thoroughly and let it dry completely before starting. Also replace or fully re-sanitize anything that touched the substrate, like paper towels and sprayers, because residual contamination can reintroduce mold next cycle.
What’s the biggest mistake when transferring multiple tubs in the same room?
Try to keep your transfer workspace separate, not just “clean.” If you must move between tasks, change gloves and avoid handling open tubs after you have been near active fruiting areas. Even clothing changes can reduce risk, because spores can cling to fabric and get carried back.
How big should the grow bag chunks be when crumbling into the monotub?
If you over-crumble and create dust-like material, distribution gets uneven and the top can dry out or colonize irregularly. Aim for chunk sizes in the golf-ball range, a mix of medium chunks plus some finer pieces, so you get airflow through the mass without creating a loose, dry layer.
Can more fresh air during early post-transfer colonization improve results?
Don’t rely on “more fresh air” as a universal fix. During early colonization, too much FAE can drop humidity and slow growth, or collapse forming pins. Use measured, brief ventilation changes only when you see the substrate shifting toward primordia.
What should I double-check about FAE holes before I open the grow bag?
If your tub has completely blocked FAE holes (polyfill too tight or tape coverage issues), the tub can over-accumulate CO2 and moisture imbalance. Confirm holes are open, polyfill is packed firmly but not obstructed, and tape seals are intact before transfer so you do not have to troubleshoot after the substrate is already exposed.
Next Articles
Monotub vs Grow Bag: Which Works Best for Your Setup
Monotub vs grow bag comparison for mushrooms and plants: setup, moisture, contamination, cost, and step-by-step start ti
Best All-in-One Mushroom Grow Bag: How to Choose and Start
Pick the best all-in-one mushroom grow bag for your species, space, humidity, and experience. Start, maintain, troublesh
Best All-in-One Mushroom Grow Bag Reddit Picks and How-To
Reddit-style picks for the best all-in-one mushroom grow bag, plus step-by-step use and troubleshooting for better yield