The best all-in-one mushroom grow bag gives you a sterilized, nutrient-rich substrate inside a filtered polypropylene bag, ready to inoculate and fruit without building anything from scratch. You add spores or liquid culture, seal it up, and let the mycelium do its thing. That's the promise, anyway. Whether it delivers depends on the specific bag you pick, the species you're growing, and how well you manage the basics: temperature, humidity, and fresh air exchange. This guide walks you through exactly what to look for, how to choose between gourmet and "magic" mushroom bags, and how to get from bag to harvest without the common pitfalls.
Best All-in-One Mushroom Grow Bag: How to Choose and Start
Marcus Holloway
24 Mar 2026
What a real all-in-one grow bag should include
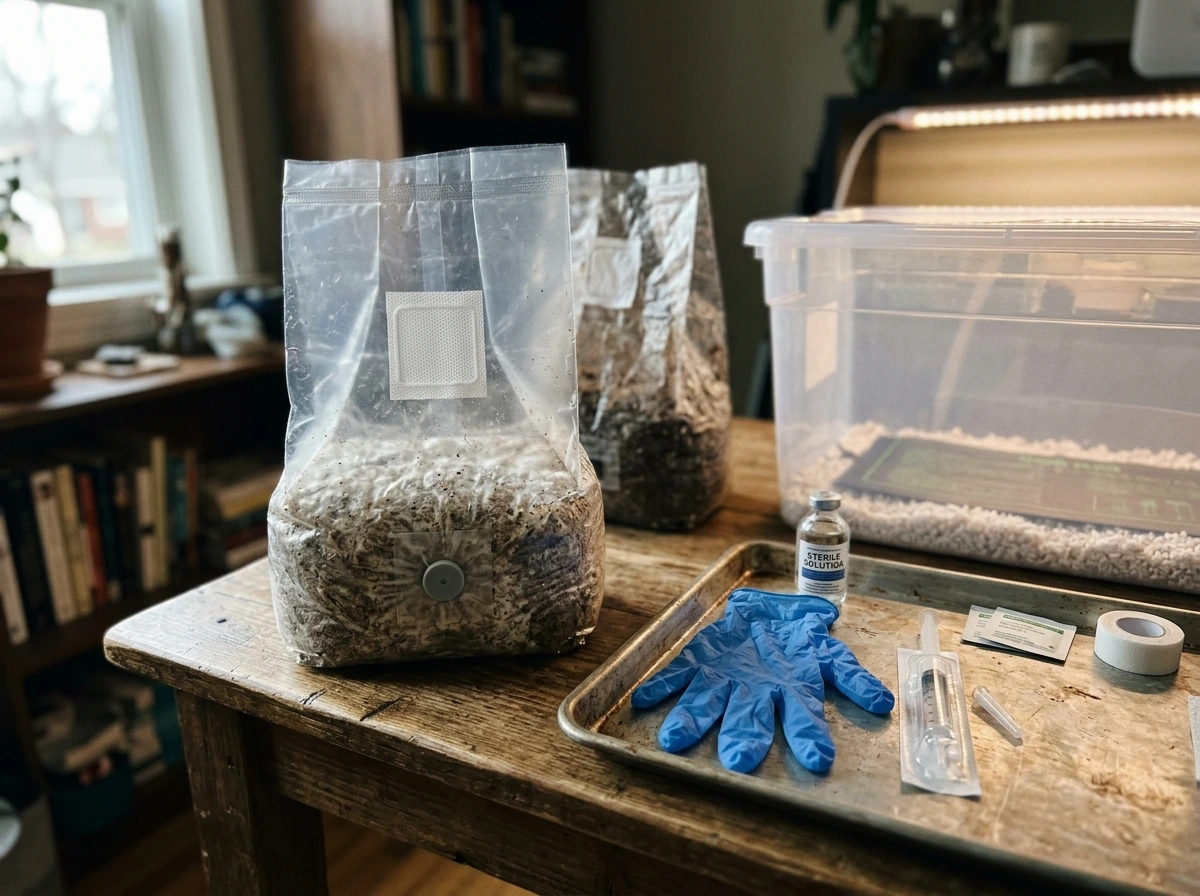
The term "all-in-one" gets thrown around loosely, so let's be specific. A genuine all-in-one mushroom grow bag should arrive with everything except your inoculant (spores or liquid culture). The substrate is already mixed, hydrated, and sterilized inside the bag. You shouldn't need to pasteurize anything, build a still air box, or buy separate filter patches.
Here's what a quality bag must have before you spend a dollar on it:
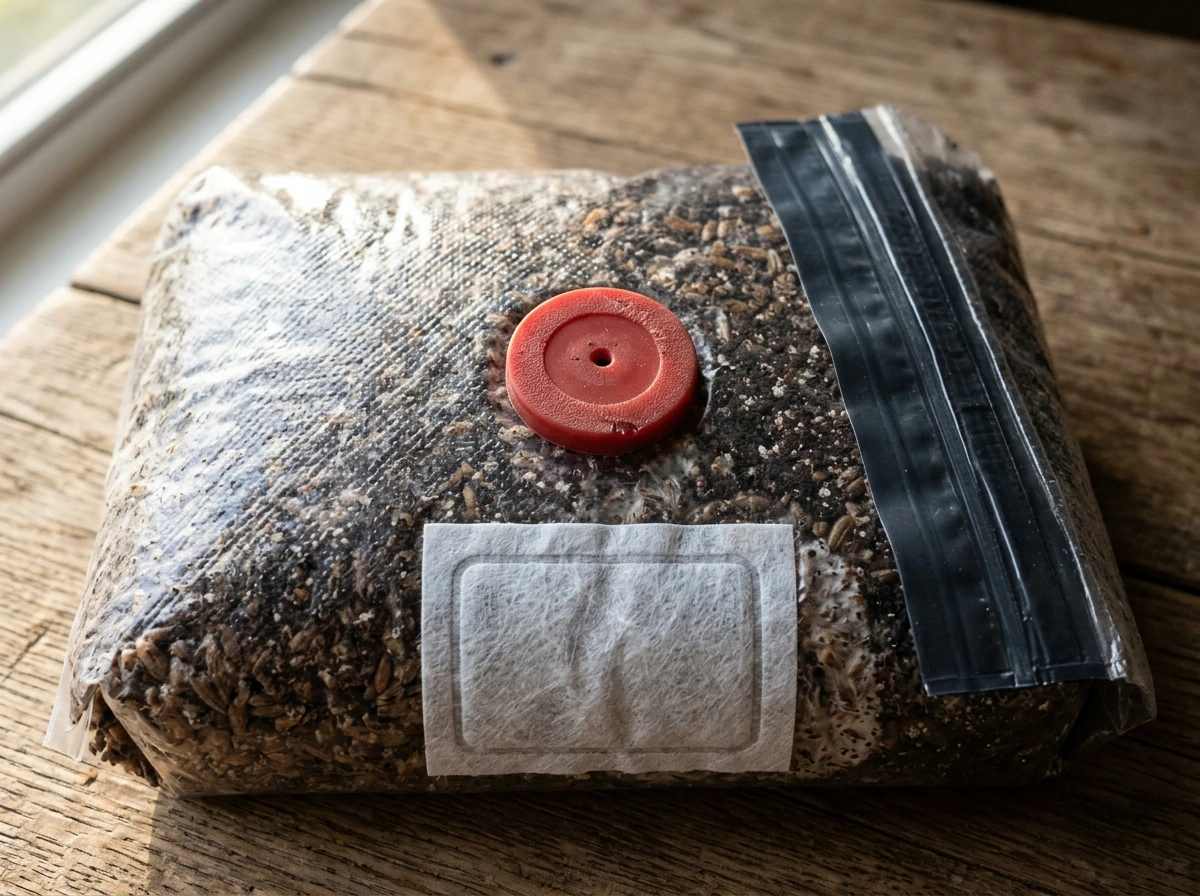
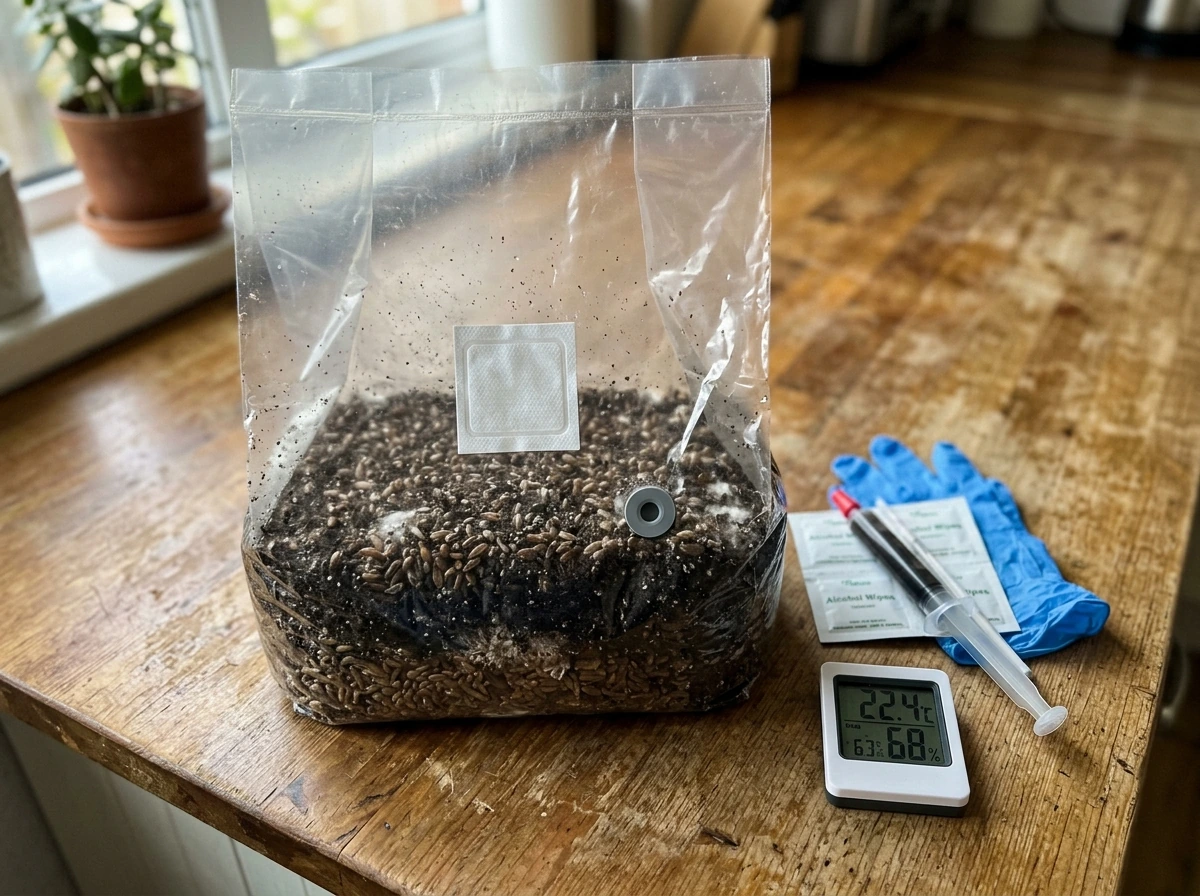
- A self-healing injection port: This lets you inject spores or liquid culture with a syringe without compromising the sterile environment. Any bag without one forces you to open the bag and risk contamination.
- A 0.2 micron filter patch: This is the industry standard pore size for gas exchange. It lets CO2 out and O2 in while blocking bacteria, mold spores, and other contaminants. Brands like Mycology Now and Mushroom Supplies both spec their bags at 0.2 microns.
- Pre-sterilized substrate: The substrate should be sterilized at 15 PSI for a minimum of 2 hours (pressure cooker standard). If a seller doesn't tell you how it was sterilized, that's a red flag.
- A substrate mix appropriate for your species: More on this below, but the mix matters significantly for colonization speed and yield.
- Clear instructions or access to a setup guide: Timelines, temperature targets, humidity guidance, and fruiting triggers should come with the product.
One product worth knowing: the Mushroom Supplies All-In-One Grow Kit In-A-Bag Plus (5 lbs, available through HydroBuilder) checks most of these boxes. It uses organic coco coir, vermiculite, millet, compost, and pelletized gypsum, and includes a 0.2 micron filter. It also claims you don't need to do fresh air exchange until harvest, which is appealing for beginners, though that claim depends heavily on your ambient conditions. It comes with a 30-day warranty, which gives you some recourse if the substrate arrives compromised.
Gourmet vs. "magic" mushrooms: choosing the right bag for your goal
This is the fork in the road, and the two paths look very similar on the surface but diverge significantly in terms of legality, availability, and what the bag actually contains.
Gourmet mushroom grow bags
If you're growing oysters, lion's mane, shiitake, or similar edible species, you have the widest selection of quality all-in-one bags available, and buying them is completely legal everywhere. These bags are widely sold by reputable suppliers, often come with species-specific instructions, and have well-documented growing parameters. For example, Blue Oyster prefers temperatures between 10°C and 21°C, Pink Oyster needs at least 16°C and really struggles below that, and Lion's Mane thrives at 16°C to 24°C. If you're in a warm climate without climate control, Pink Oyster is one of your best options. In a cooler space, Blue Oyster is more forgiving. Getting the species matched to your actual environment is one of the most important decisions you'll make.
"Magic" mushroom grow bags (psilocybin-containing species)
Bags marketed for Psilocybe cubensis and similar species are a different situation. In most of the US and many other countries, psilocybin spores themselves are legal to purchase and possess for microscopy purposes, but germinating them into mycelium or growing fruiting bodies is illegal at the federal level and in most states. best psilocybe cubensis grow bag In most of the US and many other countries, psilocybin spores themselves are legal to purchase and possess for microscopy purposes, but germinating them into mycelium or growing fruiting bodies is illegal at the federal level and in most states. A few jurisdictions have decriminalized or legalized personal cultivation, so local law varies significantly. The bags themselves (sterilized substrate with filter and injection port) are identical in design to gourmet bags. What you're really buying is the growing medium, not the spores. We cover strain-specific considerations for Psilocybe cubensis separately, but the setup process, bag specifications, and troubleshooting for "magic" bags are nearly identical to gourmet bags.
The four things that actually determine bag quality
1. Substrate composition
The substrate is what your mycelium eats, so it matters more than the bag material itself. Different species prefer different mixes. Oyster mushrooms are aggressive colonizers that do well in straw-based or coco coir mixes. Lion's mane prefers a hardwood-heavy substrate. Psilocybe cubensis colonizes well in brown rice flour and vermiculite (BRF tek) or rye grain, but also performs well in more complex mixes like the coco coir, vermiculite, millet, compost, and gypsum blend mentioned above. When evaluating a bag, look for transparency about what's in the substrate and whether it matches your target species. Vague claims like "premium ingredients" without a breakdown are worth scrutinizing.
2. Colonization state
Most all-in-one bags ship uncolonized (sterilized and ready for your inoculant). A few sellers ship partially or fully colonized bags, which shortens your timeline but also means the mycelium has been through shipping stress. For beginners, starting with a sterile uncolonized bag and inoculating yourself gives you more control and teaches you the process. Just make sure the bag you receive looks clean (no green, black, or orange patches) and smells neutral, not sour or musty.
3. Air exchange design
The filter patch is doing double duty: it lets the bag breathe while keeping contaminants out. A 0.2 micron filter is the standard you want. Anything marketed as "breathable" without specifying pore size should be questioned. During colonization, CO2 buildup inhibits mycelium growth, so adequate passive exchange through the filter is essential. During fruiting, you'll supplement with active fresh air exchange (FAE) by briefly opening the bag or fanning. The claim that you need "no FAE until harvest" applies mainly to colonization, not to fruiting. Once pins form, fresh air becomes critical to developing thick, well-formed mushrooms rather than thin, elongated ones.
4. Bag design and material
Mushroom grow bags are almost universally made from polypropylene (PP), which tolerates the high heat of sterilization and doesn't leach into the substrate. The bag should be thick enough to resist punctures during shipping and handling, with a heat-sealed bottom and a gusseted design so it stands upright on its own. The injection port should be clearly marked and made from self-healing silicone. Some bags include a zip-lock or fold-and-tape closure for after inoculation. The size of the bag affects yield: a 3-5 lb bag is a good starting point for beginners, while experienced growers often work with 10 lb bags for higher yields.
Where to buy and what to check before ordering
Buying from a reputable supplier makes a meaningful difference. You want someone who sterilizes in-house, ships quickly to minimize degradation, and has real customer reviews for contamination rates and colonization results. Here's what to verify before clicking buy:
- Sterilization specs: At minimum, look for 15 PSI for 2 hours. This is standard for eliminating thermophilic bacteria.
- Filter patch spec: 0.2 micron filter, sized at least 1.5" x 1.5" for adequate gas exchange.
- Self-healing injection port: Non-negotiable for a clean inoculation process.
- Substrate ingredients listed explicitly: Know what you're getting.
- Shipping time and method: A bag sitting in a hot postal truck for a week is a contamination risk. Look for expedited shipping options, especially in summer.
- Return/warranty policy: A 30-day warranty like Mushroom Supplies offers is a reasonable baseline. No warranty at all is a warning sign.
- Customer reviews mentioning contamination rates: Some contamination is expected in any sterile grow operation, but if reviews consistently mention green mold or no growth, skip it.
Reputable suppliers include Mycology Now, Mushroom Supplies (via HydroBuilder and other distributors), North Spore, and Midwest Grow Kits for gourmet species. For substrate-only all-in-one bags compatible with psilocybin spore inoculation, many of the same suppliers sell the bags separately from the spores. We have a dedicated guide on where to buy mushroom grow bags if you want a full breakdown of supplier options by region and species.
How to set up and grow from your bag: timeline and steps
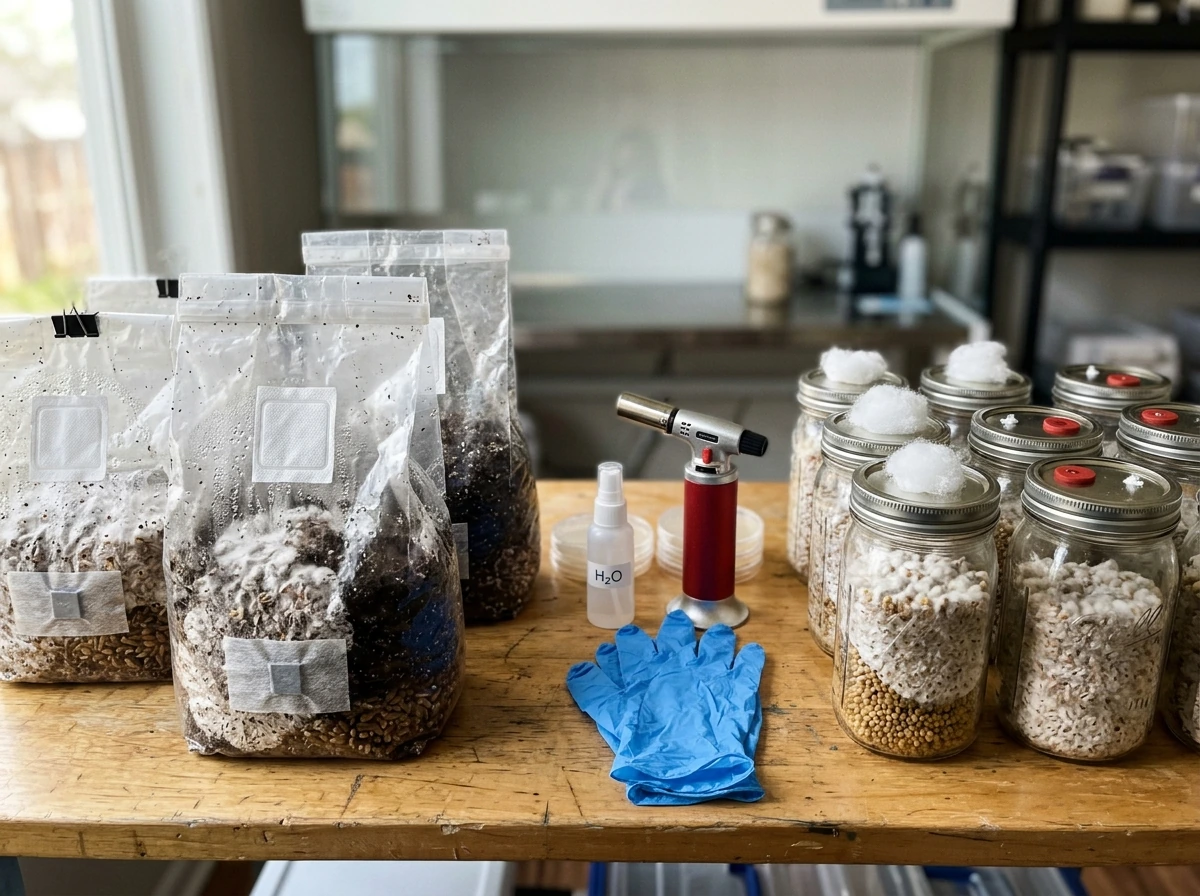
Inoculation
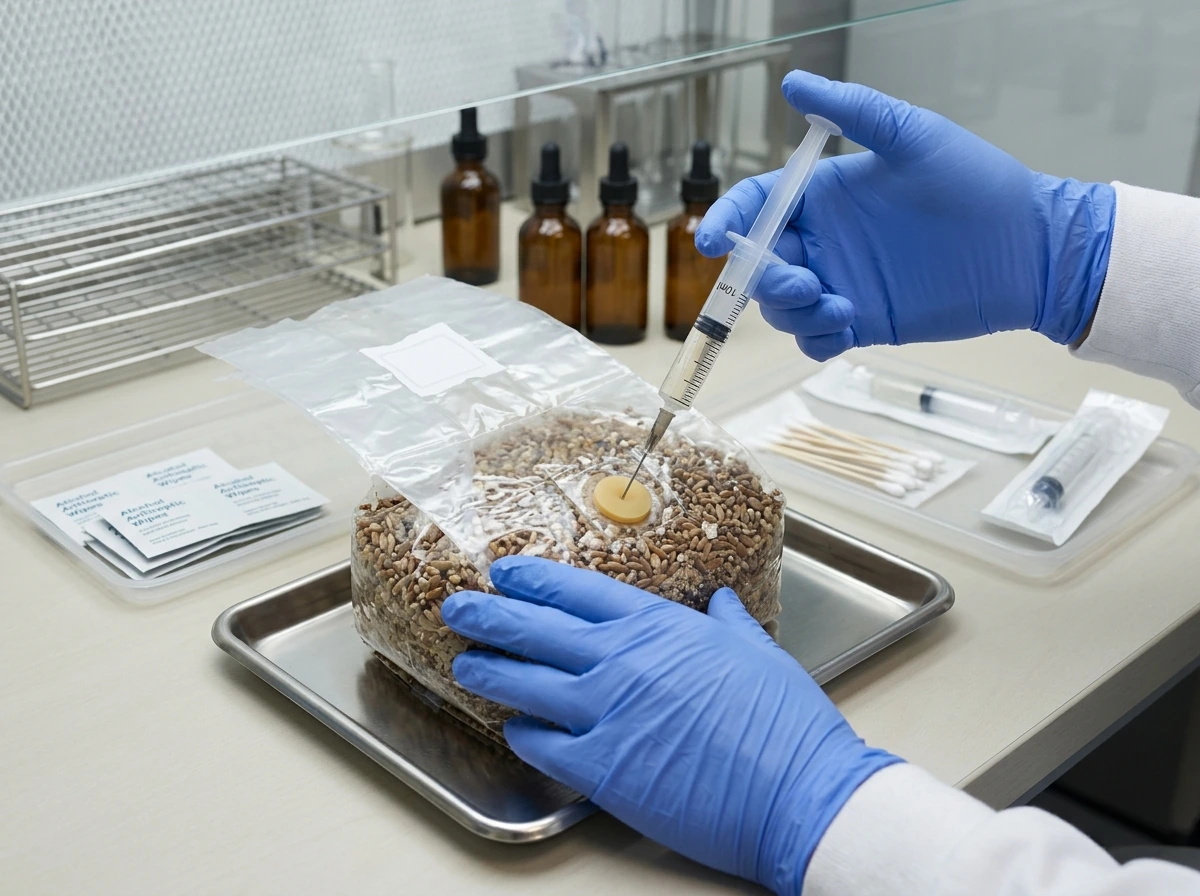
Work in the cleanest environment you can manage. Wipe down your workspace with isopropyl alcohol (70% is more effective than 91% for surface disinfection). Flame-sterilize your syringe needle until it glows, let it cool for 10-15 seconds, then inject through the self-healing port. For a 5 lb bag, use 5-10 ml of liquid culture or a full 10 ml spore syringe. Distribute the inoculant across multiple injection points if the port allows, or inject at an angle to spread coverage. Seal the injection hole with an alcohol-wiped piece of Micropore tape if it doesn't self-seal completely.
Colonization
Place the bag in a warm, dark location. Most species colonize fastest between 21°C and 27°C (70°F to 80°F). Psilocybe cubensis is comfortable at the higher end of that range. Oysters will colonize across a wider range. Lion's mane prefers cooler temps, around 18°C to 24°C. You should see white, fluffy mycelium spreading from your injection sites within 7-14 days. Gently massage the bag once or twice during colonization to distribute colonized substrate and speed up the process. The bag is fully colonized when it's uniformly white with no visible substrate showing through. Lion's mane mycelium grows faint compared to oysters, so don't panic if it looks less dramatic. Full colonization typically takes 3-5 weeks depending on species, substrate, temperature, and inoculant quality.
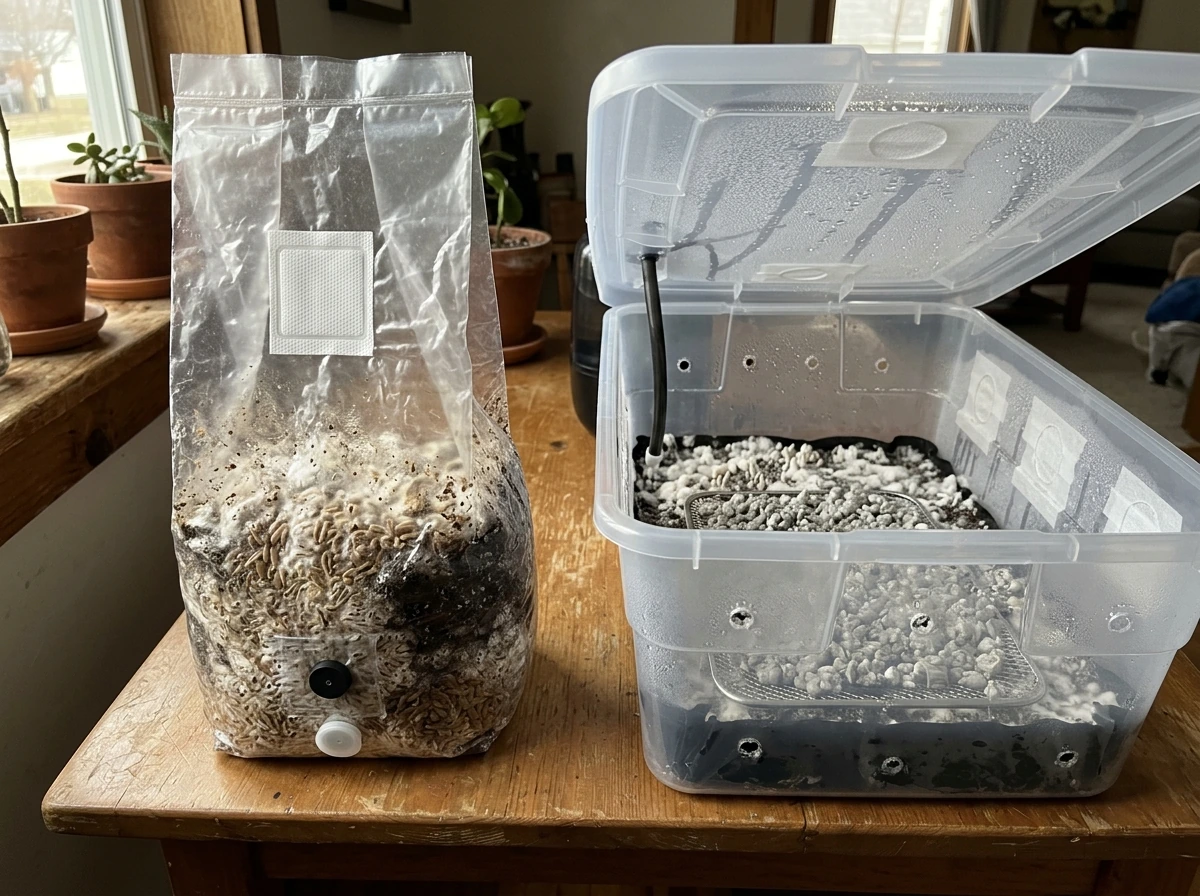
Fruiting initiation
Once fully colonized, the block needs a trigger to fruit. Cut an X or a series of slits in the bag (or remove the top), introduce fresh air, lower the temperature slightly (a 5°C drop helps signal the change of season), and increase humidity. This is where the humidity tent method works well: cut your openings, place a loosely fitted clear plastic tent or bag over the block with about 4-6 inches of clearance on every side for the mushrooms to grow. Use a dozen or so 1/4-inch holes in the tent to balance humidity retention and fresh air. Mist the inside of the tent lightly once or twice a day, but don't mist directly onto the block or pins. Pins should appear within 5-14 days of initiating fruiting conditions.
Harvest
Harvest just before or as the veil underneath the cap begins to tear (for species that have veils). For oysters and lion's mane, harvest when the edges of the cap/cluster are still slightly rolled under and before they start to flatten and release spores. Twist and pull the entire cluster off cleanly rather than cutting, which can leave a stump that rots and invites contamination. Lion's mane kits typically produce a harvestable crop around 21 days from fruiting initiation. After harvesting, remove any remaining debris, mist lightly, and allow the block to rest for 1-2 weeks before the next flush. Most blocks produce 2-3 flushes, with yields declining each time.
| Species | Colonization Temp | Fruiting Temp | Time to First Harvest | Difficulty |
|---|---|---|---|---|
| Blue Oyster | 21-24°C (70-75°F) | 10-21°C (50-70°F) | 3-5 weeks post-inoculation | Easy |
| Pink Oyster | 24-29°C (75-85°F) | 16-27°C (60-80°F) | 3-4 weeks post-inoculation | Easy |
| Lion's Mane | 18-24°C (65-75°F) | 16-24°C (60-75°F) | ~21 days post-fruiting trigger | Moderate |
| Psilocybe cubensis | 24-27°C (75-80°F) | 21-24°C (70-75°F) | 4-6 weeks post-inoculation | Moderate |
When things go wrong: troubleshooting the most common problems
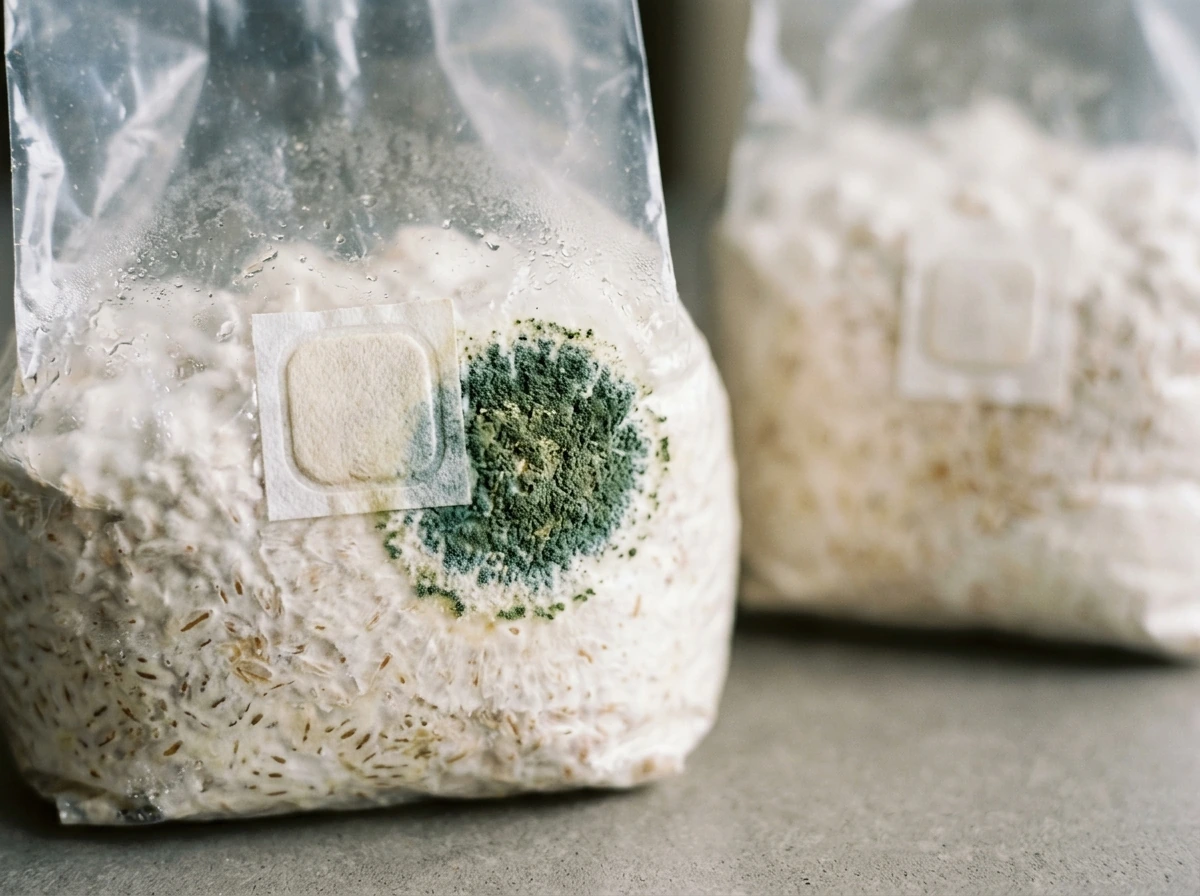
Contamination (green, black, or orange mold)
Green mold (Trichoderma) is the most common contaminant and is a sign that something compromised the sterile environment, whether that's a faulty injection port seal, unsterilized inoculant, or a bag that was damaged in shipping. If contamination appears before the block is fully colonized, the block is almost certainly a loss. Isolate it immediately in a sealed plastic bag and dispose of it outdoors. Don't open it inside. If contamination appears after full colonization and only at the surface, you may be able to carefully remove the affected area and continue, but the risk of spreading is high. Prevention beats intervention here.
No pins forming
If your block is fully colonized but refuses to pin, the most common causes are: temperature too high (no cold shock), insufficient fresh air exchange, not enough humidity, or too much light (or no light). Try moving the block to a cooler spot for 24-48 hours, introducing more FAE by opening the bag or tent briefly several times a day, and misting more consistently. Some strains are just slower to pin. Give it at least 2 weeks after initiating fruiting conditions before concluding something is wrong.
Slow colonization
If mycelium growth stalls or looks thin and patchy after 3 weeks, check your temperature first. Colonization below 18°C slows dramatically. Also check that the bag isn't sitting in direct light, which can inhibit mycelium spread. If the substrate smells sour or ammonia-like rather than earthy and mushroom-like, bacterial contamination may be present even if you can't see it. A stalled colonization that doesn't smell right is usually a loss.
Low yields or thin, leggy mushrooms
Thin, elongated mushrooms with small caps are almost always a CO2 problem. Increase fresh air exchange by opening your humidity tent more frequently or adding more holes. Leggy mushrooms mean the mycelium is reaching for oxygen. Low overall yield on the first flush often comes from inconsistent humidity: the surface dries out and pins abort. Mist more consistently, and make sure your humidity tent has adequate clearance (at least 4-6 inches on every side) so moisture can distribute evenly.
After harvest: reuse, cleanup, and getting a second flush
Once you've harvested your first flush, clear any spent mushroom bases from the block surface. A clean surface reduces the risk of bacterial rot between flushes. Lightly mist the exposed block face, re-cover with your humidity tent, and let it rest in colonization conditions (dark, slightly warmer) for 7-14 days. The block will often start pinning again on its own. Most all-in-one [mushroom grow bag](/mushroom-grow-bags/mushroom-grow-bags-vs-jars)s are good for 2-3 flushes, with the second flush often being the largest, if you’re deciding between monotub vs grow bag, it’s worth comparing how each method handles multiple flushes.
After the block stops producing, you have options. Spent substrate from gourmet mushroom bags is an excellent garden amendment and can be composted directly. Some growers also use spent substrate to inoculate outdoor patches, particularly for oyster mushrooms, which colonize wood chips readily. Whether you can reuse the bag itself depends on condition: the polypropylene bags are durable, but re-sterilizing them at home reliably is difficult. We cover that topic in detail in a separate guide on reusing mushroom grow bags.
Cleaning up after spent bags is straightforward. Break the block apart outdoors if possible (to avoid spreading spores inside your home), bag the substrate for compost or garbage, and wipe down the area with isopropyl alcohol. Don't let a spent or contaminated block sit around in a warm space, as it becomes a contamination source for future grows.
Safety, legality, and setting realistic expectations
For gourmet mushroom grow bags, there are no legal complications. The main safety consideration is accurate species identification before eating, which is non-issue when you're growing from a labeled kit with a known species. Don't let a fully colonized block sit unattended for weeks in hot conditions, as bacterial contamination can produce harmful compounds.
For psilocybin mushroom cultivation, the legal picture is more complicated. Psilocybin spores are legal to purchase in most US states for research or microscopy purposes, but germinating those spores into mycelium is illegal under federal law and in the majority of states. Oregon and Colorado have created legal frameworks for supervised therapeutic use, and several cities have decriminalized personal cultivation, but "decriminalized" is not the same as "legal." Know your local law before proceeding. This site doesn't encourage illegal activity, but we also think adults deserve accurate, practical information to make informed decisions.
On realistic expectations: all-in-one grow bags are genuinely one of the easiest entry points into mushroom cultivation. They eliminate the most technically demanding steps (substrate preparation, sterilization, grain spawn production) and reduce the learning curve significantly. But they are not foolproof. Contamination happens, pins abort, and some bags arrive compromised despite best efforts from the supplier. A 30-day warranty covers some of that risk, but you should go in expecting that your first grow might not be perfect, and that's fine. The learning you do on a single $30-50 bag is worth more than any tutorial.
Quick checklist: what to look for before buying
- Self-healing injection port included (silicone, clearly labeled)
- 0.2 micron filter patch, at least 1.5" x 1.5"
- Substrate sterilized at 15 PSI for 2+ hours
- Substrate ingredients listed and appropriate for your target species
- Bag size matches your experience level (3-5 lbs for beginners, up to 10 lbs for experienced growers)
- Supplier has recent, verified customer reviews with low contamination complaint rates
- Ships with insulation or cold packs in warm months, or offers expedited shipping
- Warranty or replacement policy of at least 30 days
- Clear instructions included or accessible online
- Species temperature range matches your growing environment
FAQ
What should I do if the bag arrives with tiny green specks or fuzzy growth spots before I inoculate it?
Do not inject. A visible patch suggests contamination in the sterile substrate or filter area. Separate the bag, keep it sealed, contact the seller for replacement under their warranty policy, and sanitize the workspace because spores can hitchhike on packaging and gloves.
How can I tell whether poor results are from the bag or from my inoculation technique?
Watch timing and pattern. If you see contamination early (before full colonization) in multiple areas, it often points to inoculation or sealing issues (needle, port, or micropore tape). If the block colonizes evenly and only later develops surface mold, it is more likely a fresh-air or humidity imbalance during fruiting, or a damaged bag/port after inoculation.
Is a 0.2 micron filter always enough, or can a bag still contaminate?
A 0.2 micron filter reduces risk but cannot guarantee sterility. Contamination can still occur through the self-healing injection port, a poorly sealed closure, or a filter that was damaged in shipping. If your bag claims micron size, also check that the port and closure are intact on arrival.
Do I need to open the bag for fresh air exchange during colonization, or is that only for fruiting?
Most all-in-one bags are designed for passive exchange through the filter during colonization, so you generally do not need routine opening. If your environment is very warm or very still, you might see slow or thin colonization, and that can improve with gentle handling and ensuring the bag is not overheated, but avoid frequent opening unless the brand’s instructions say it is acceptable.
How much should I massage the bag during colonization, and can too much cause problems?
Massage lightly once or twice only after you have visible white growth near the injection sites. Aggressive squeezing can break up the mycelium, slow consolidation, and increase the chance of pushing moisture into less healthy areas. If you notice wet or sour odors after handling, stop and reassess.
What’s the best way to handle the temperature drop when initiating fruiting?
A 3 to 5°C reduction is usually enough. Going too low or too fast can delay pinning, especially for species that prefer warmer fruiting. Use a consistent schedule, and avoid placing the bag in direct airflow from heaters or AC vents that can dry the surface even if ambient humidity seems adequate.
My mushrooms look thin and leggy, but humidity seems high. What else should I check?
Leggy growth often points to excess CO2 or insufficient fresh air exchange rather than humidity alone. Add more tent holes or increase how often you briefly open the tent, then confirm your tent clearance stays at least 4 to 6 inches so air can circulate and CO2 can move out. Also check that you cut enough openings after colonization.
How often should I mist inside the humidity tent, and how do I prevent over-wetting?
Mist lightly once or twice daily, only to maintain surface humidity in the tent, not to soak the bag. Over-wetting can encourage bacterial patches and cause mushroom caps to abort or look waterlogged. If droplets are constantly running down, reduce misting and increase airflow slightly by adding or spacing holes.
Can I reuse the same all-in-one grow bag for another cycle if I sterilize it?
In practice, reliable home re-sterilization of the bag with its ports and filter is difficult, and the filter and seams can be hard to verify as sterile again. For most beginners, it is safer to use a new bag or a bag specifically marketed as reusable. If you try reuse, plan on a much higher contamination risk, even if the bag looks clean.
Is there a safe way to open and harvest if my home is dusty or has pets?
Yes. Harvest in a cooler room, keep the humidity tent around the block until harvest time to reduce spore spread, and avoid running fans directly at the bed during harvest. After removing clusters, immediately reseal or re-cover the block and dispose of spent material outdoors if possible.
What should I do with a spent gourmet bag after the last flush?
Remove it from your grow area promptly and do not store it warm indoors. Break the block apart outdoors if you can, bag the substrate for compost or disposal, then wipe the area with isopropyl alcohol. Leaving spent blocks sitting can seed bacteria and mold that affect future bags.
For gourmet bags, how do I confirm I harvested at the right time for best taste and texture?
Use a visual trigger. Pick right before the veil breaks or as caps begin flattening and releasing spores, because waiting too long often makes texture tougher. If your species doesn’t show a veil clearly, harvest when caps are fully expanded but still firm and before caps collapse or darken heavily.
What legality and sourcing checks should I make before buying an “all-in-one” psilocybin grow bag?
Treat labeling claims as incomplete. Even when spores are legal for purchase in some places, growing fruiting bodies is often regulated differently than holding spores. Confirm local statutes where you live and note that suppliers may sell “substrate-only” bags to avoid shipping spores, which changes what you are actually receiving.
If I accidentally inject too much liquid culture (over-inoculate), will it fail?
Often it will not fail outright, but it can increase competition from bacteria or lead to wetter spots at injection points. Stick close to the recommended ml range for bag weight, and if your bag arrives unusually wet, keep colonization conditions stable and avoid unnecessary openings until fully colonized.
Next Articles
Best All-in-One Mushroom Grow Bag Reddit Picks and How-To
Reddit-style picks for the best all-in-one mushroom grow bag, plus step-by-step use and troubleshooting for better yield
Mushroom Grow Bag vs Monotub: Which Setup Wins?
Grow bag vs monotub comparison for home mushroom growing: costs, workflow, contamination risks, yields, and how to choos
Mushroom Grow Bags vs Jars: Which Works Best for You?
Compare mushroom grow bags vs jars for home growing: costs, contamination risk, speed, yields, setup, troubleshooting, a